Large-Scale Steel Fabrication
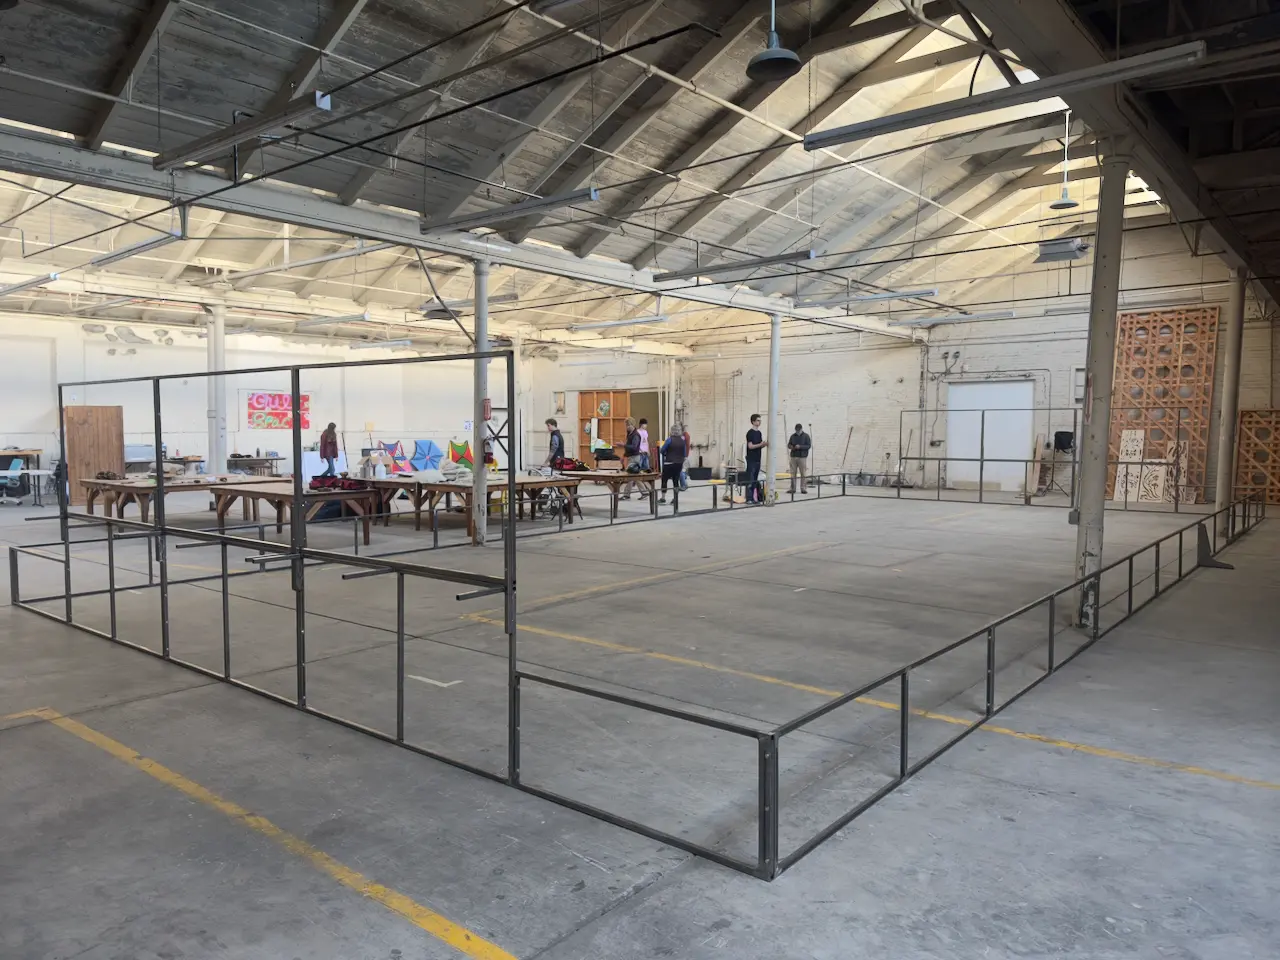
FRC Field Perimeter
A full-size field perimeter built for FRC, assembled in mild steel sections
Summary
This is a work-in-progress project. Ever since my first year competing in FRC, having a full field to practice on has been something of a pipe dream. This year, the stars alligned, and we were able to rent a large enough space to fit it. The task of building the perimeter fell to me, and I wanted to create something that would last 10+ years.
To do that, I drew on my experience with my go-kart project to make something really robust. I based the dimensions of my design off of the official field, but I started from scratch design wise. Optimizing for simplicity, part count, and transportability, I ended up with a design that uses many identical sections and can fit in the bed of a pick up truck when dismantled. I designed the field in Onshape and the CAD is available here.
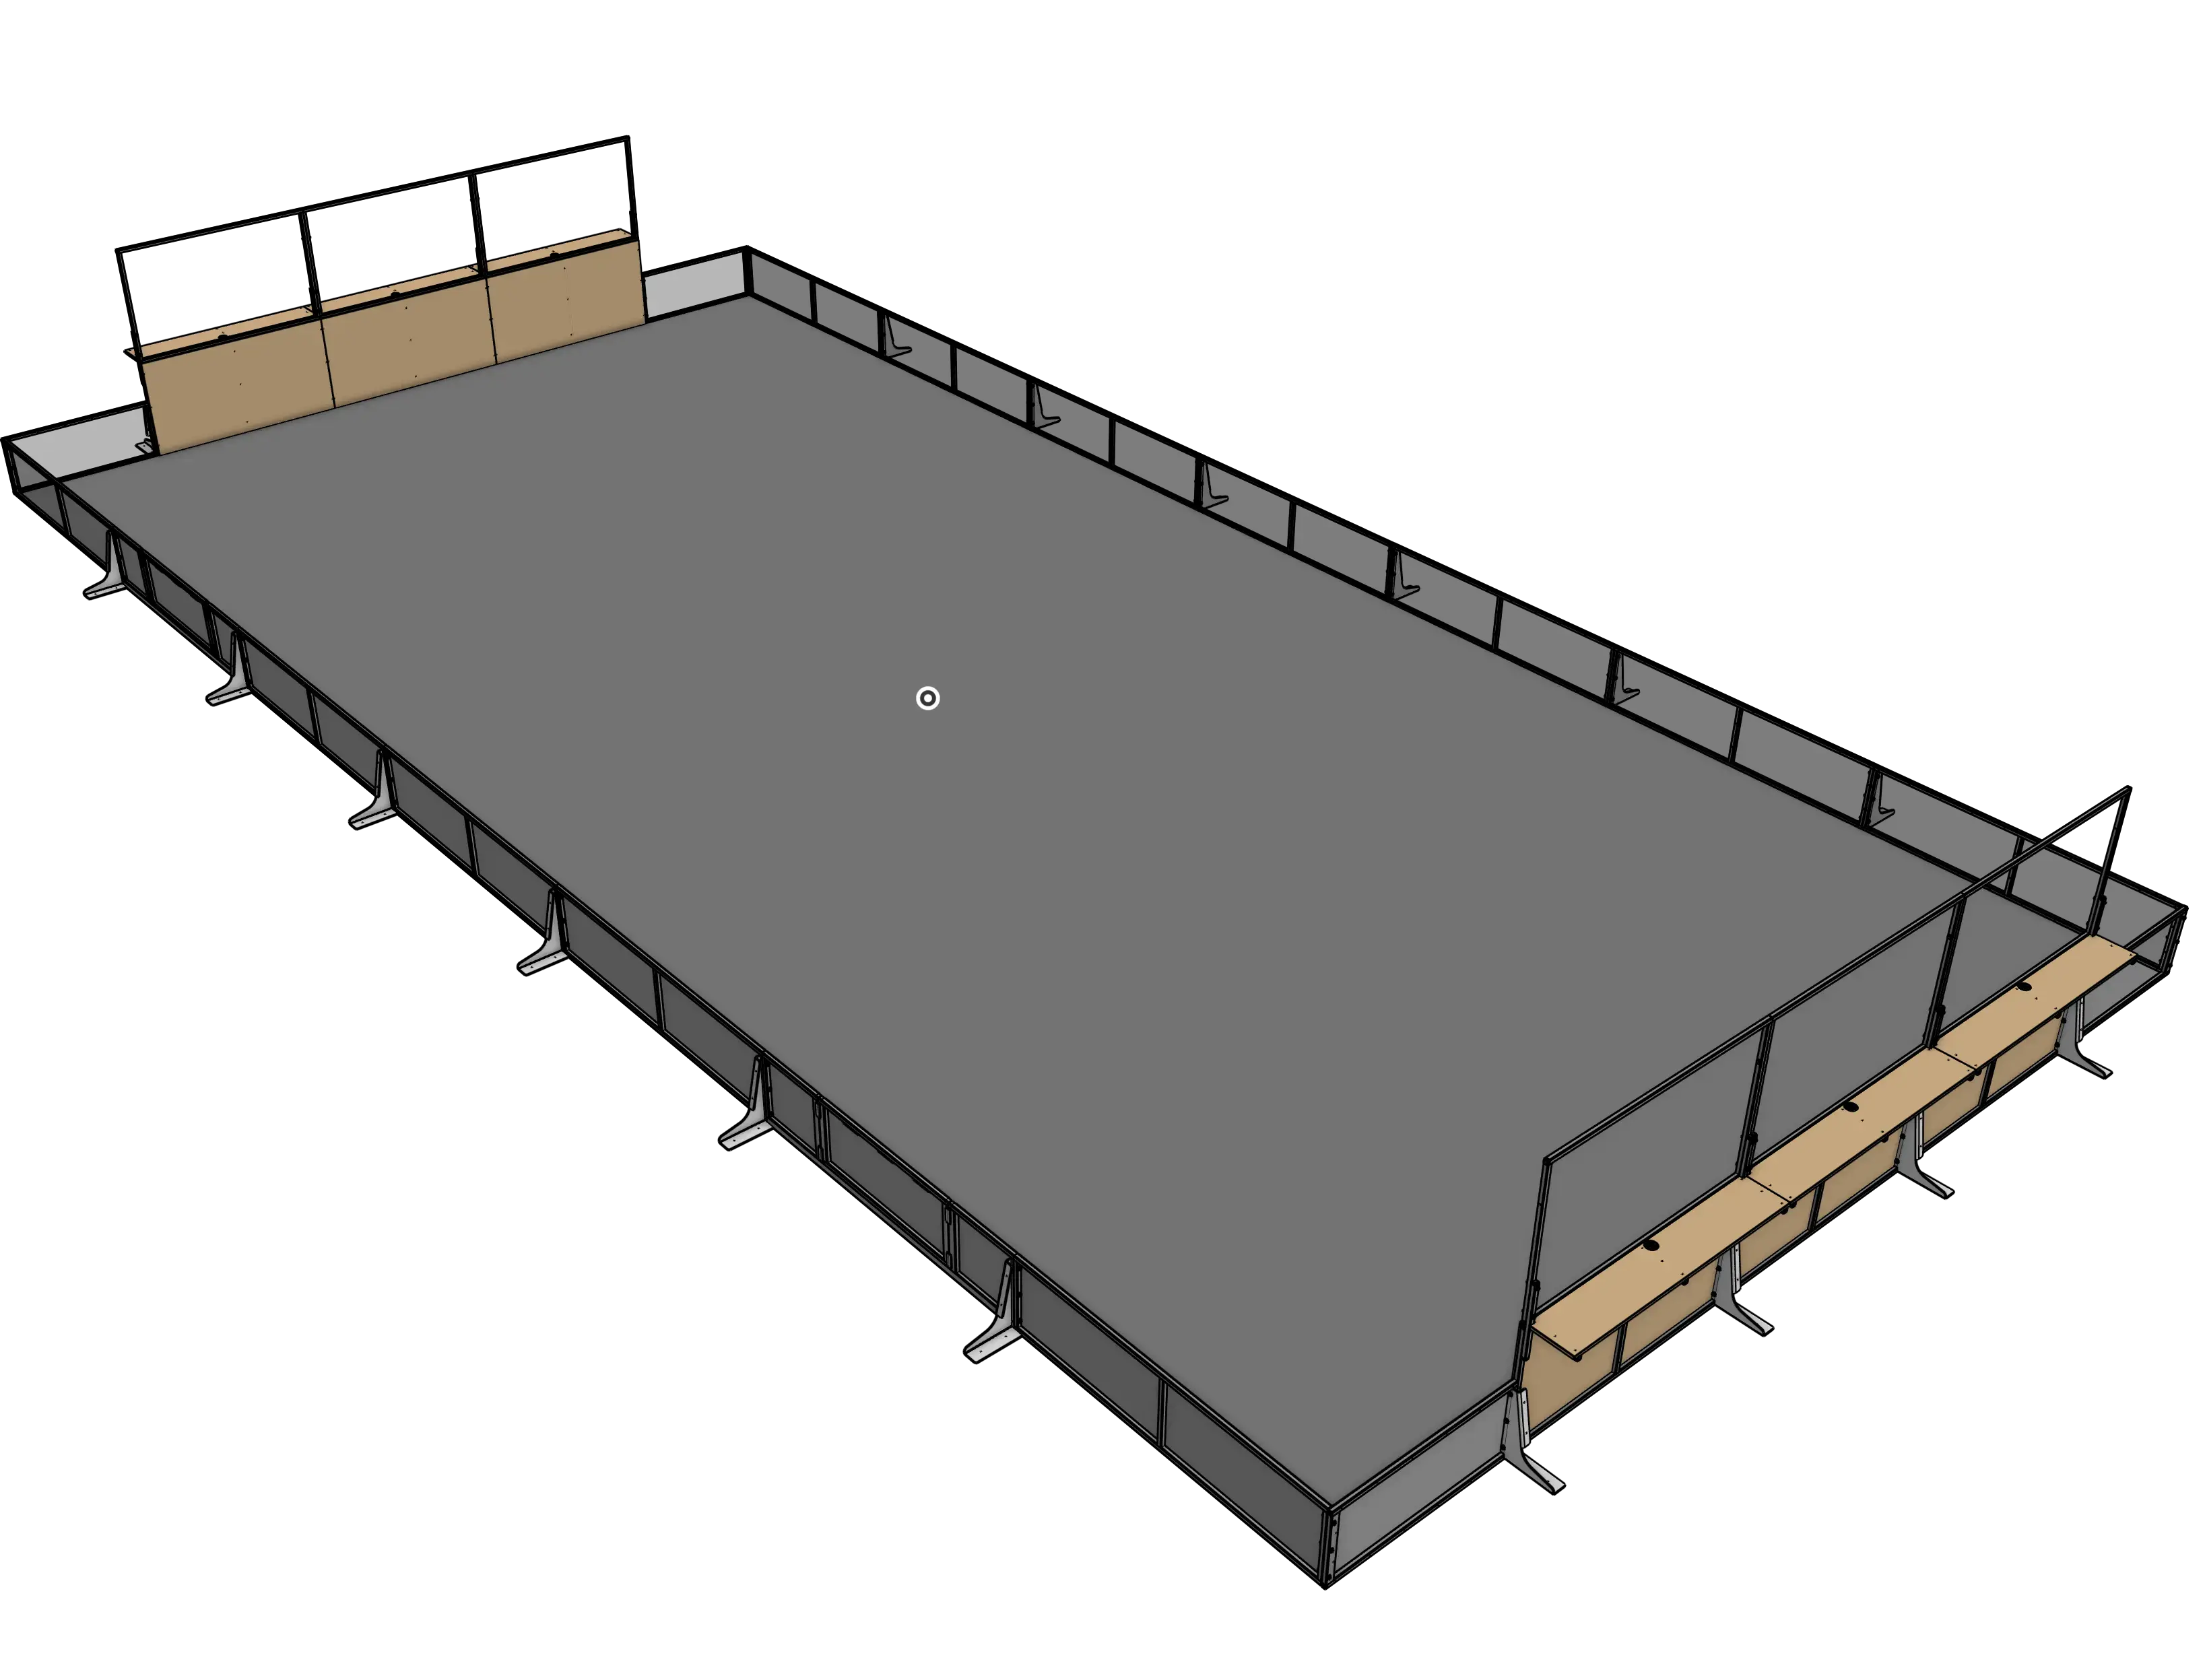
The 6 "driver station" segments split into a base and a window, and each of the wall sections split and can be stacked. Each section gets bolted to the next with 3 5/16 bolts, and most of these joints also get a bent steel "foot", which was ordered from an online laser cutting service. These get velcro on the bottom, which sticks to the carpet.
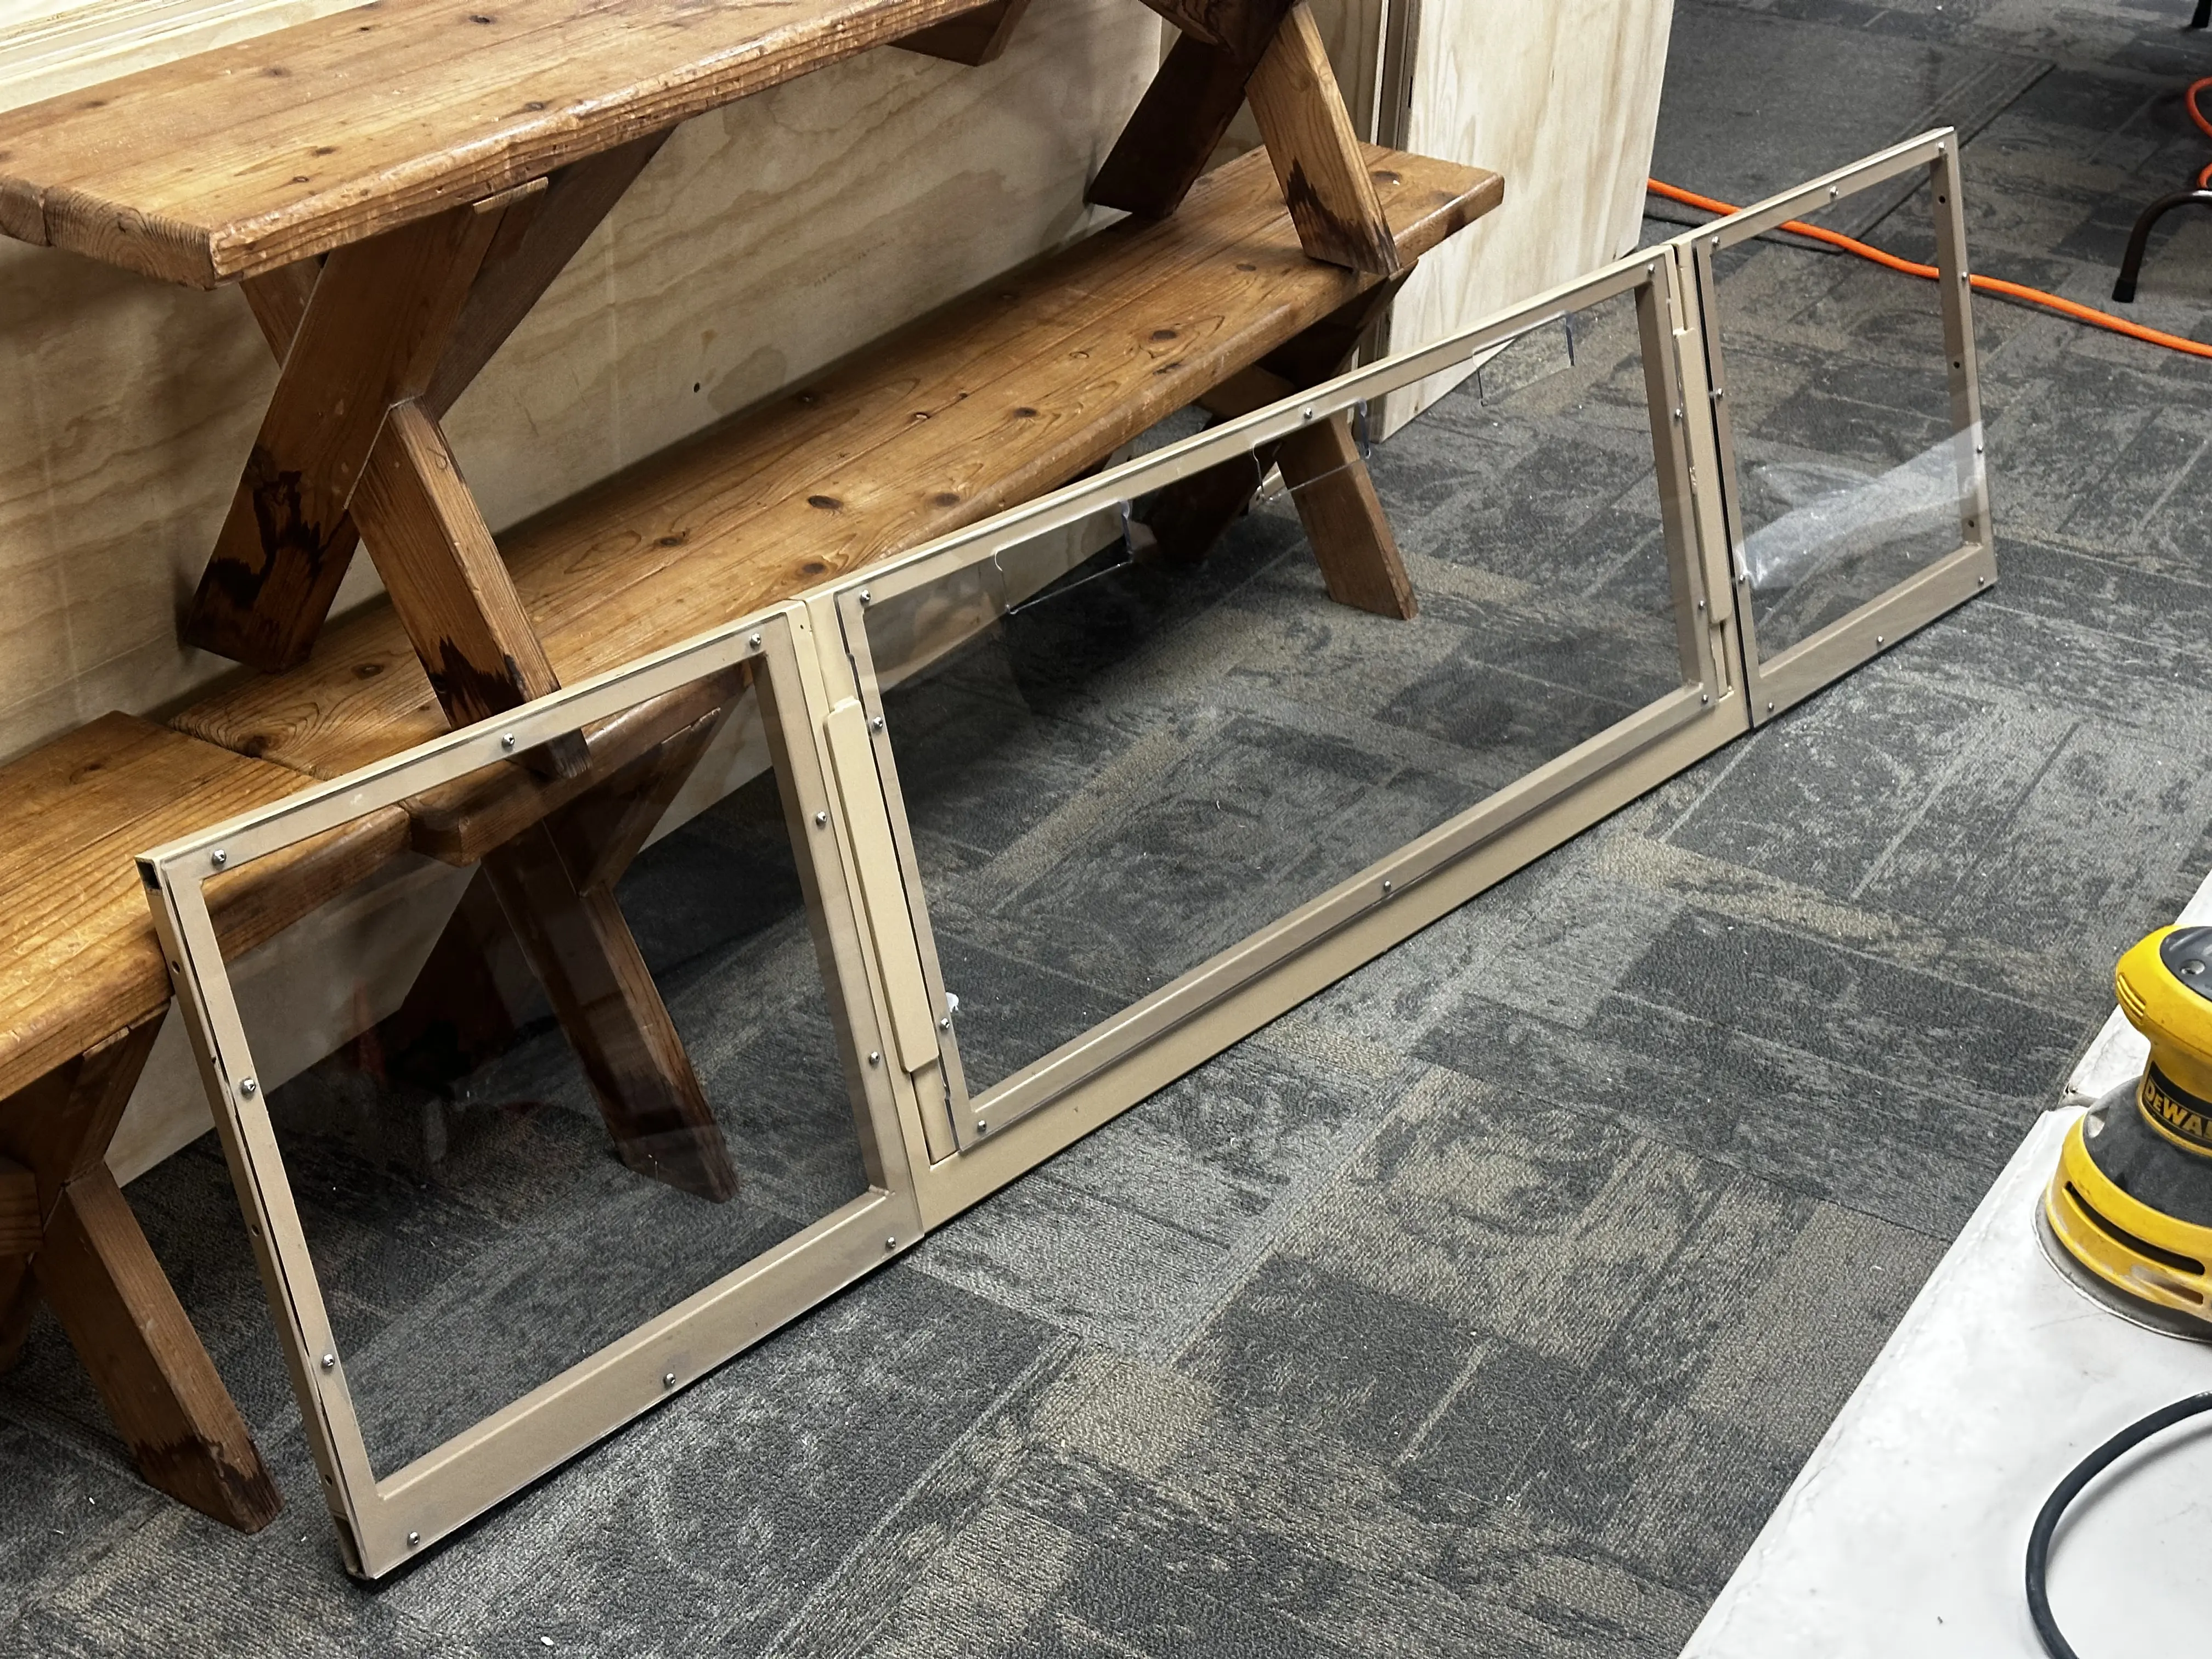
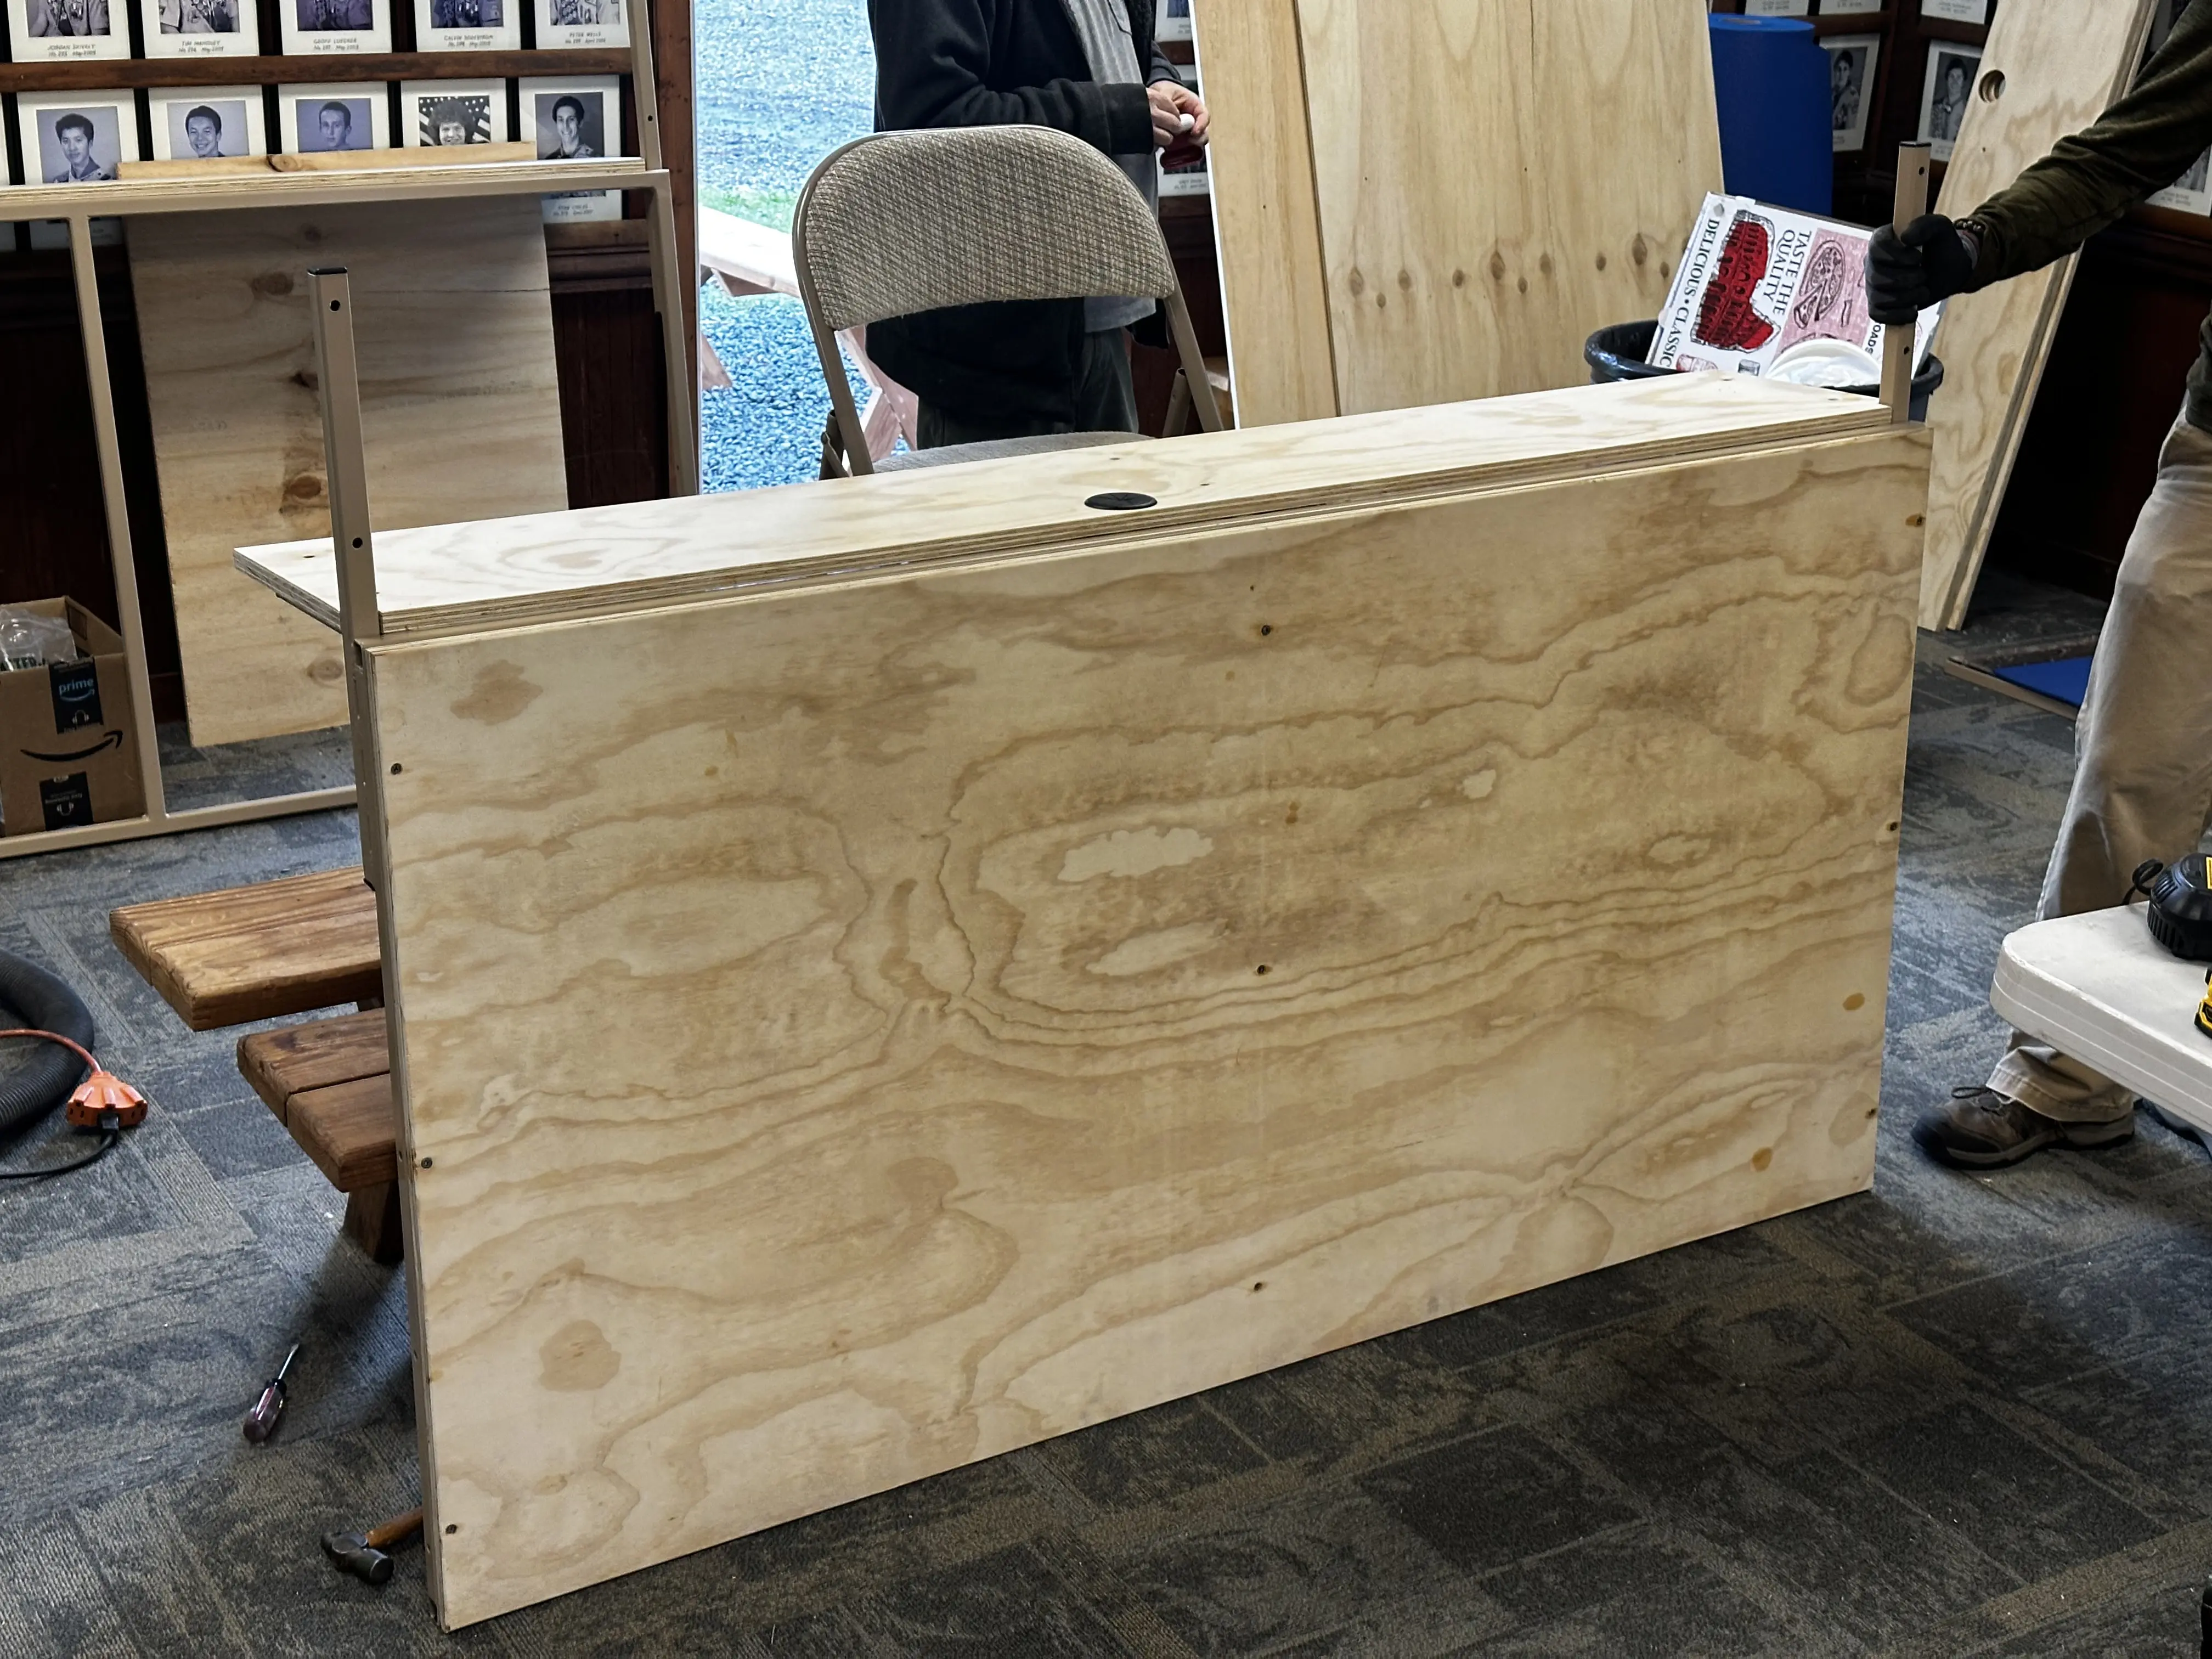
The shelves are designed to be made from 3/4 birch plywood and even have some cable grommets to make charging laptops or other devices easier. Field walls are skinned with 1/4 polycarbonate (lexan) and self-drilling screws. Finally, the door sections use some extra welded plate steel elements so they can slide out.
Fabrication
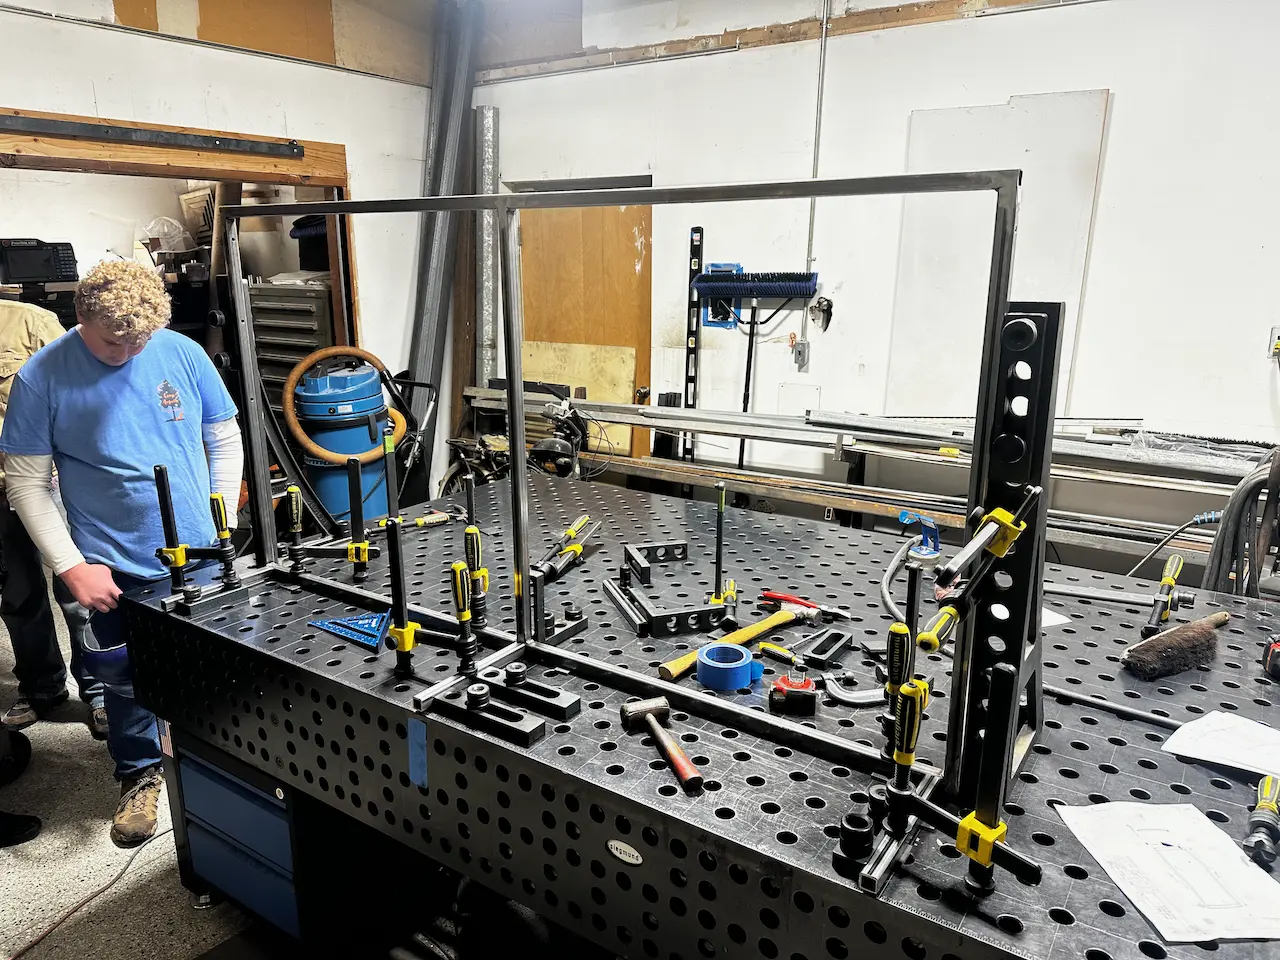
Cutting, drilling, welding and grinding all of the sections proved to be a monumental task. Working with several 8033 members and parents, we completed the work in several weekends in a welding shop on treasure island. A few things there helped hugely to accelerate the process.
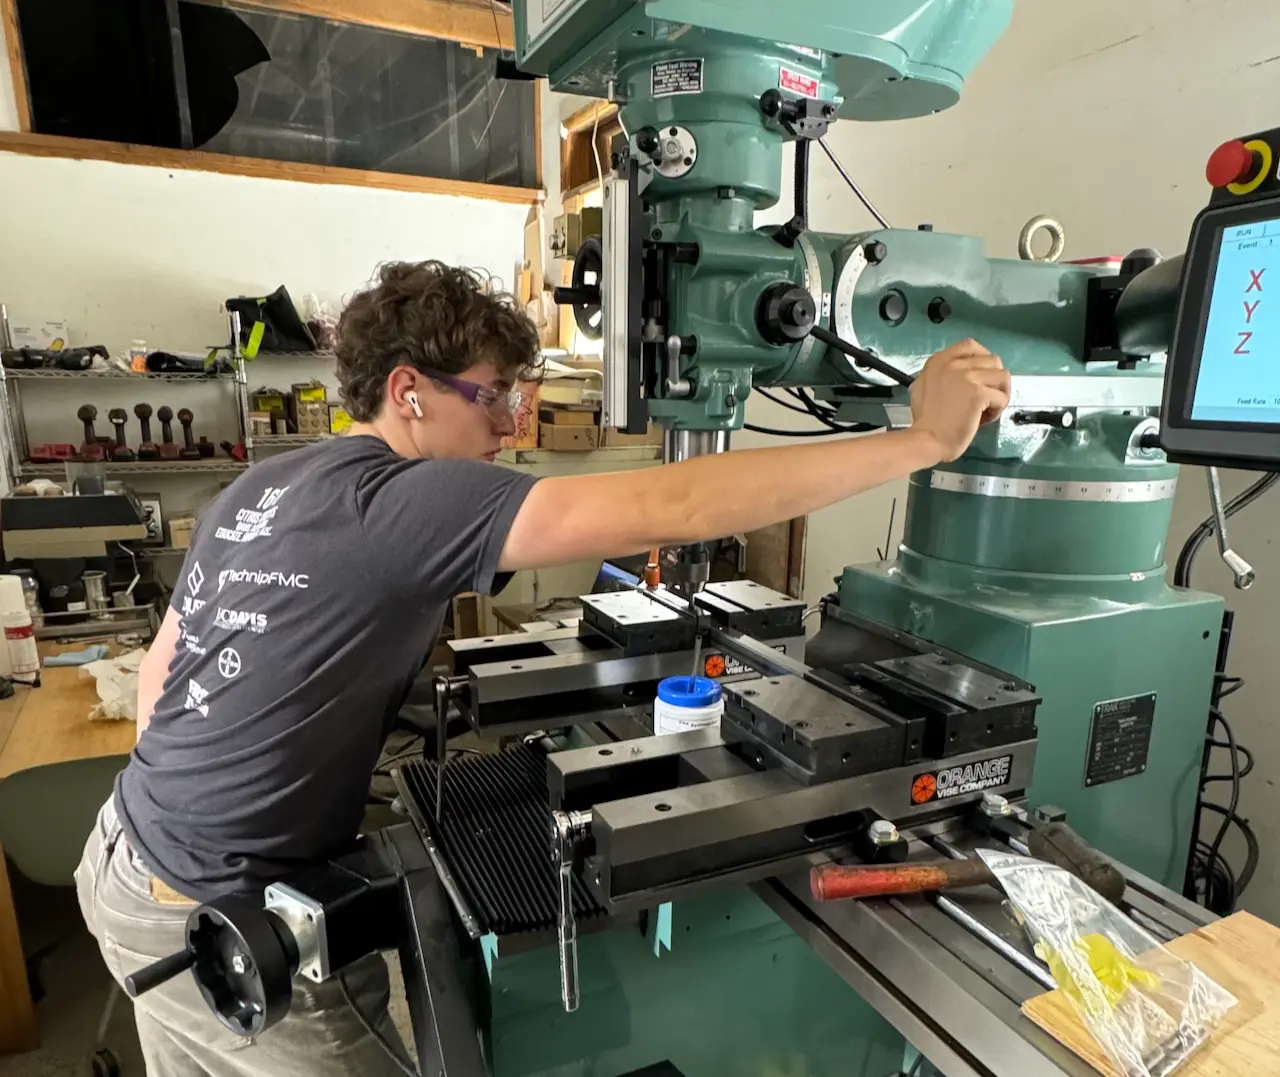
The first was this Prototrak mill, which has steppers and a conversational interface. I set up a stop and waypoints for each of the holes on the pattern, and since I designed all my 5/16 holes to have a consistent distance from an edge, this single setup was enough to drill all of the tubes over the course of a couple days.
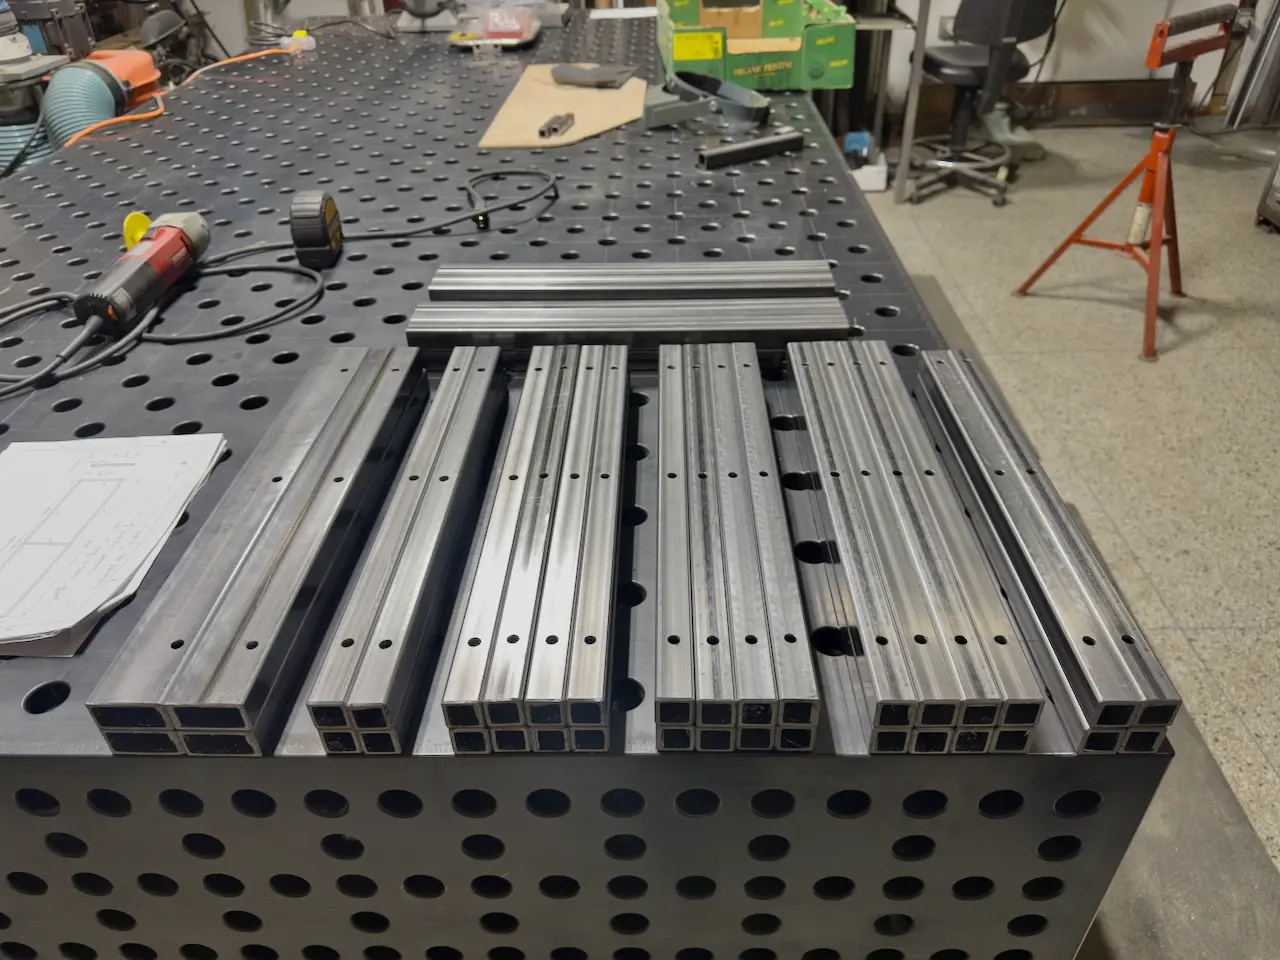
This was the first batch of steel tubing after deburring the holes. There were two more of these for the whole field to be completed.
The next major thing that helped accelerate the fabrication was this crazy Siegmund weld fixturing table. This enabled us to do setups for all the sections and weld directly.
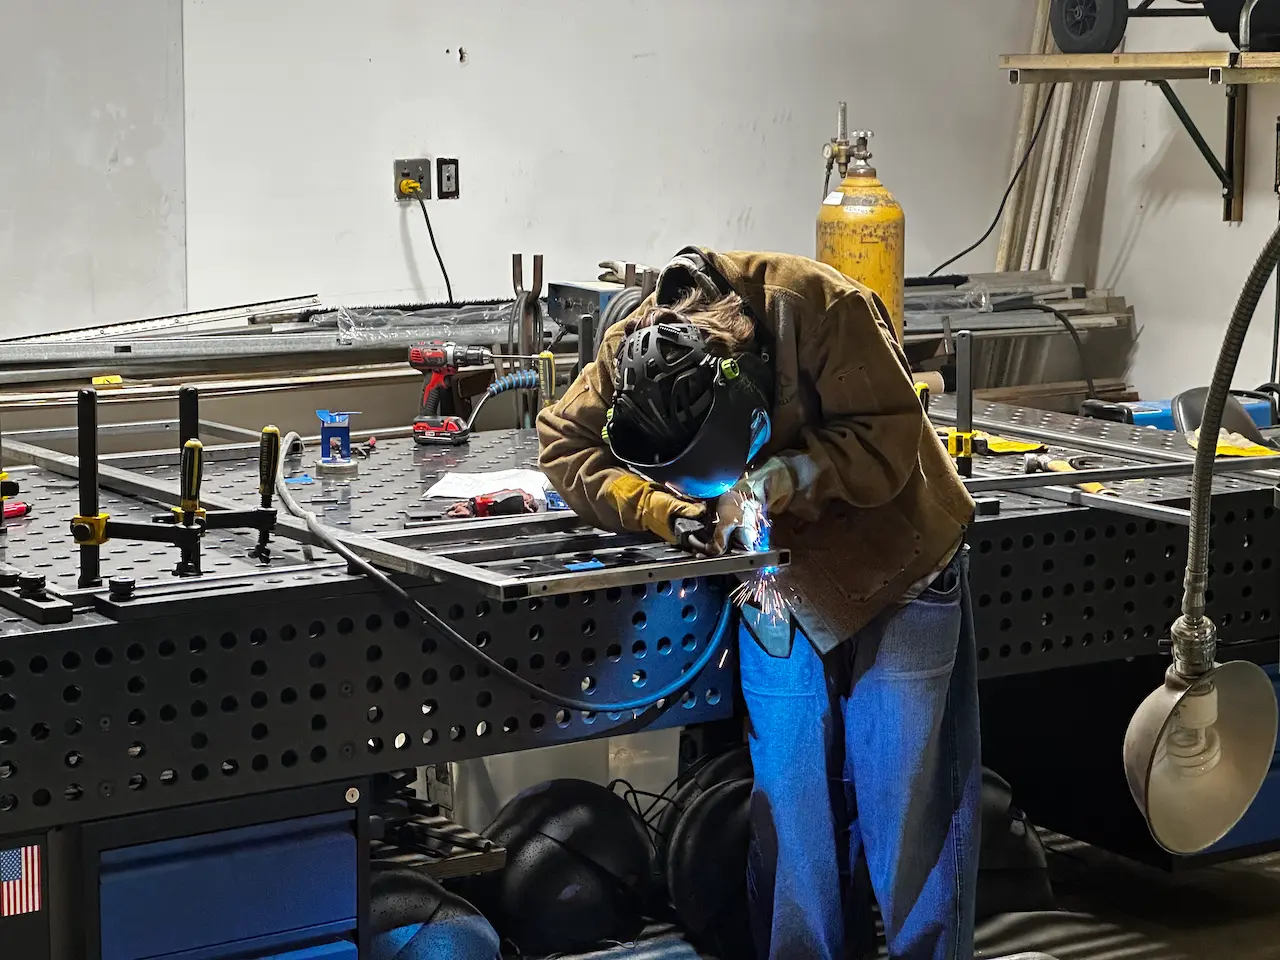
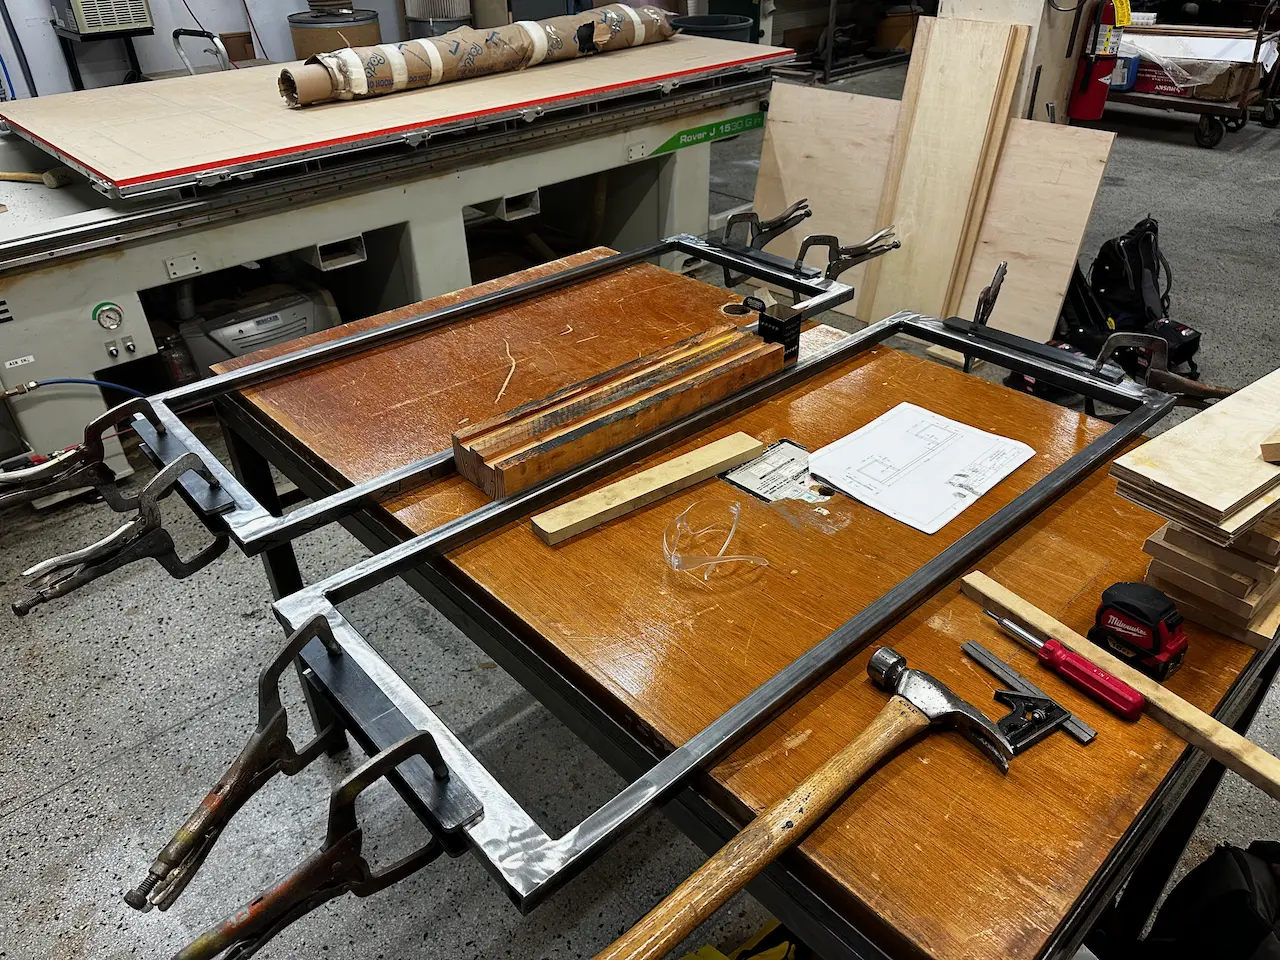
After all of this was complete, the doors were welded seperately with some clamps. Bit tedious, but got done quickly.
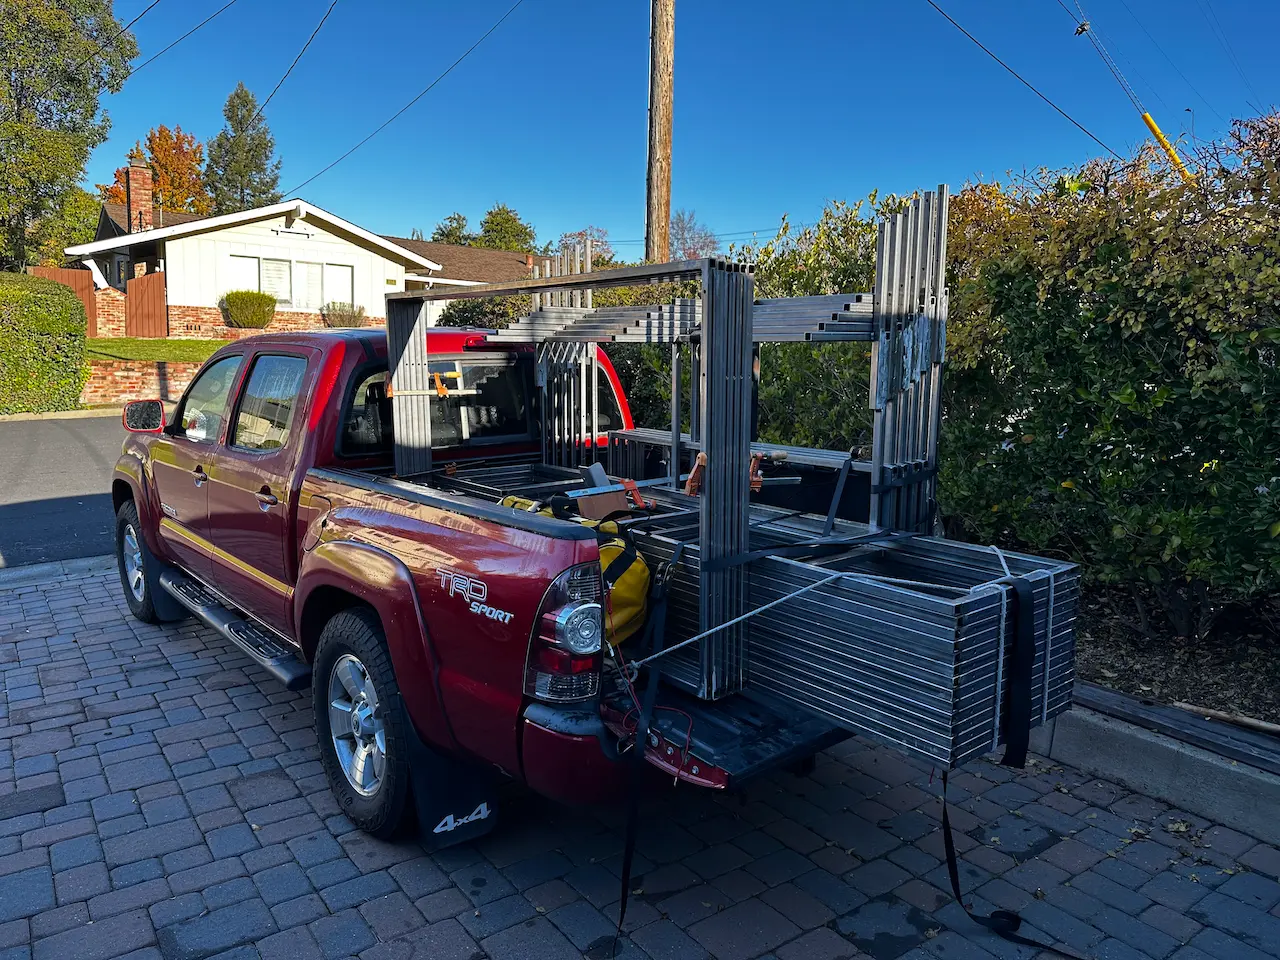
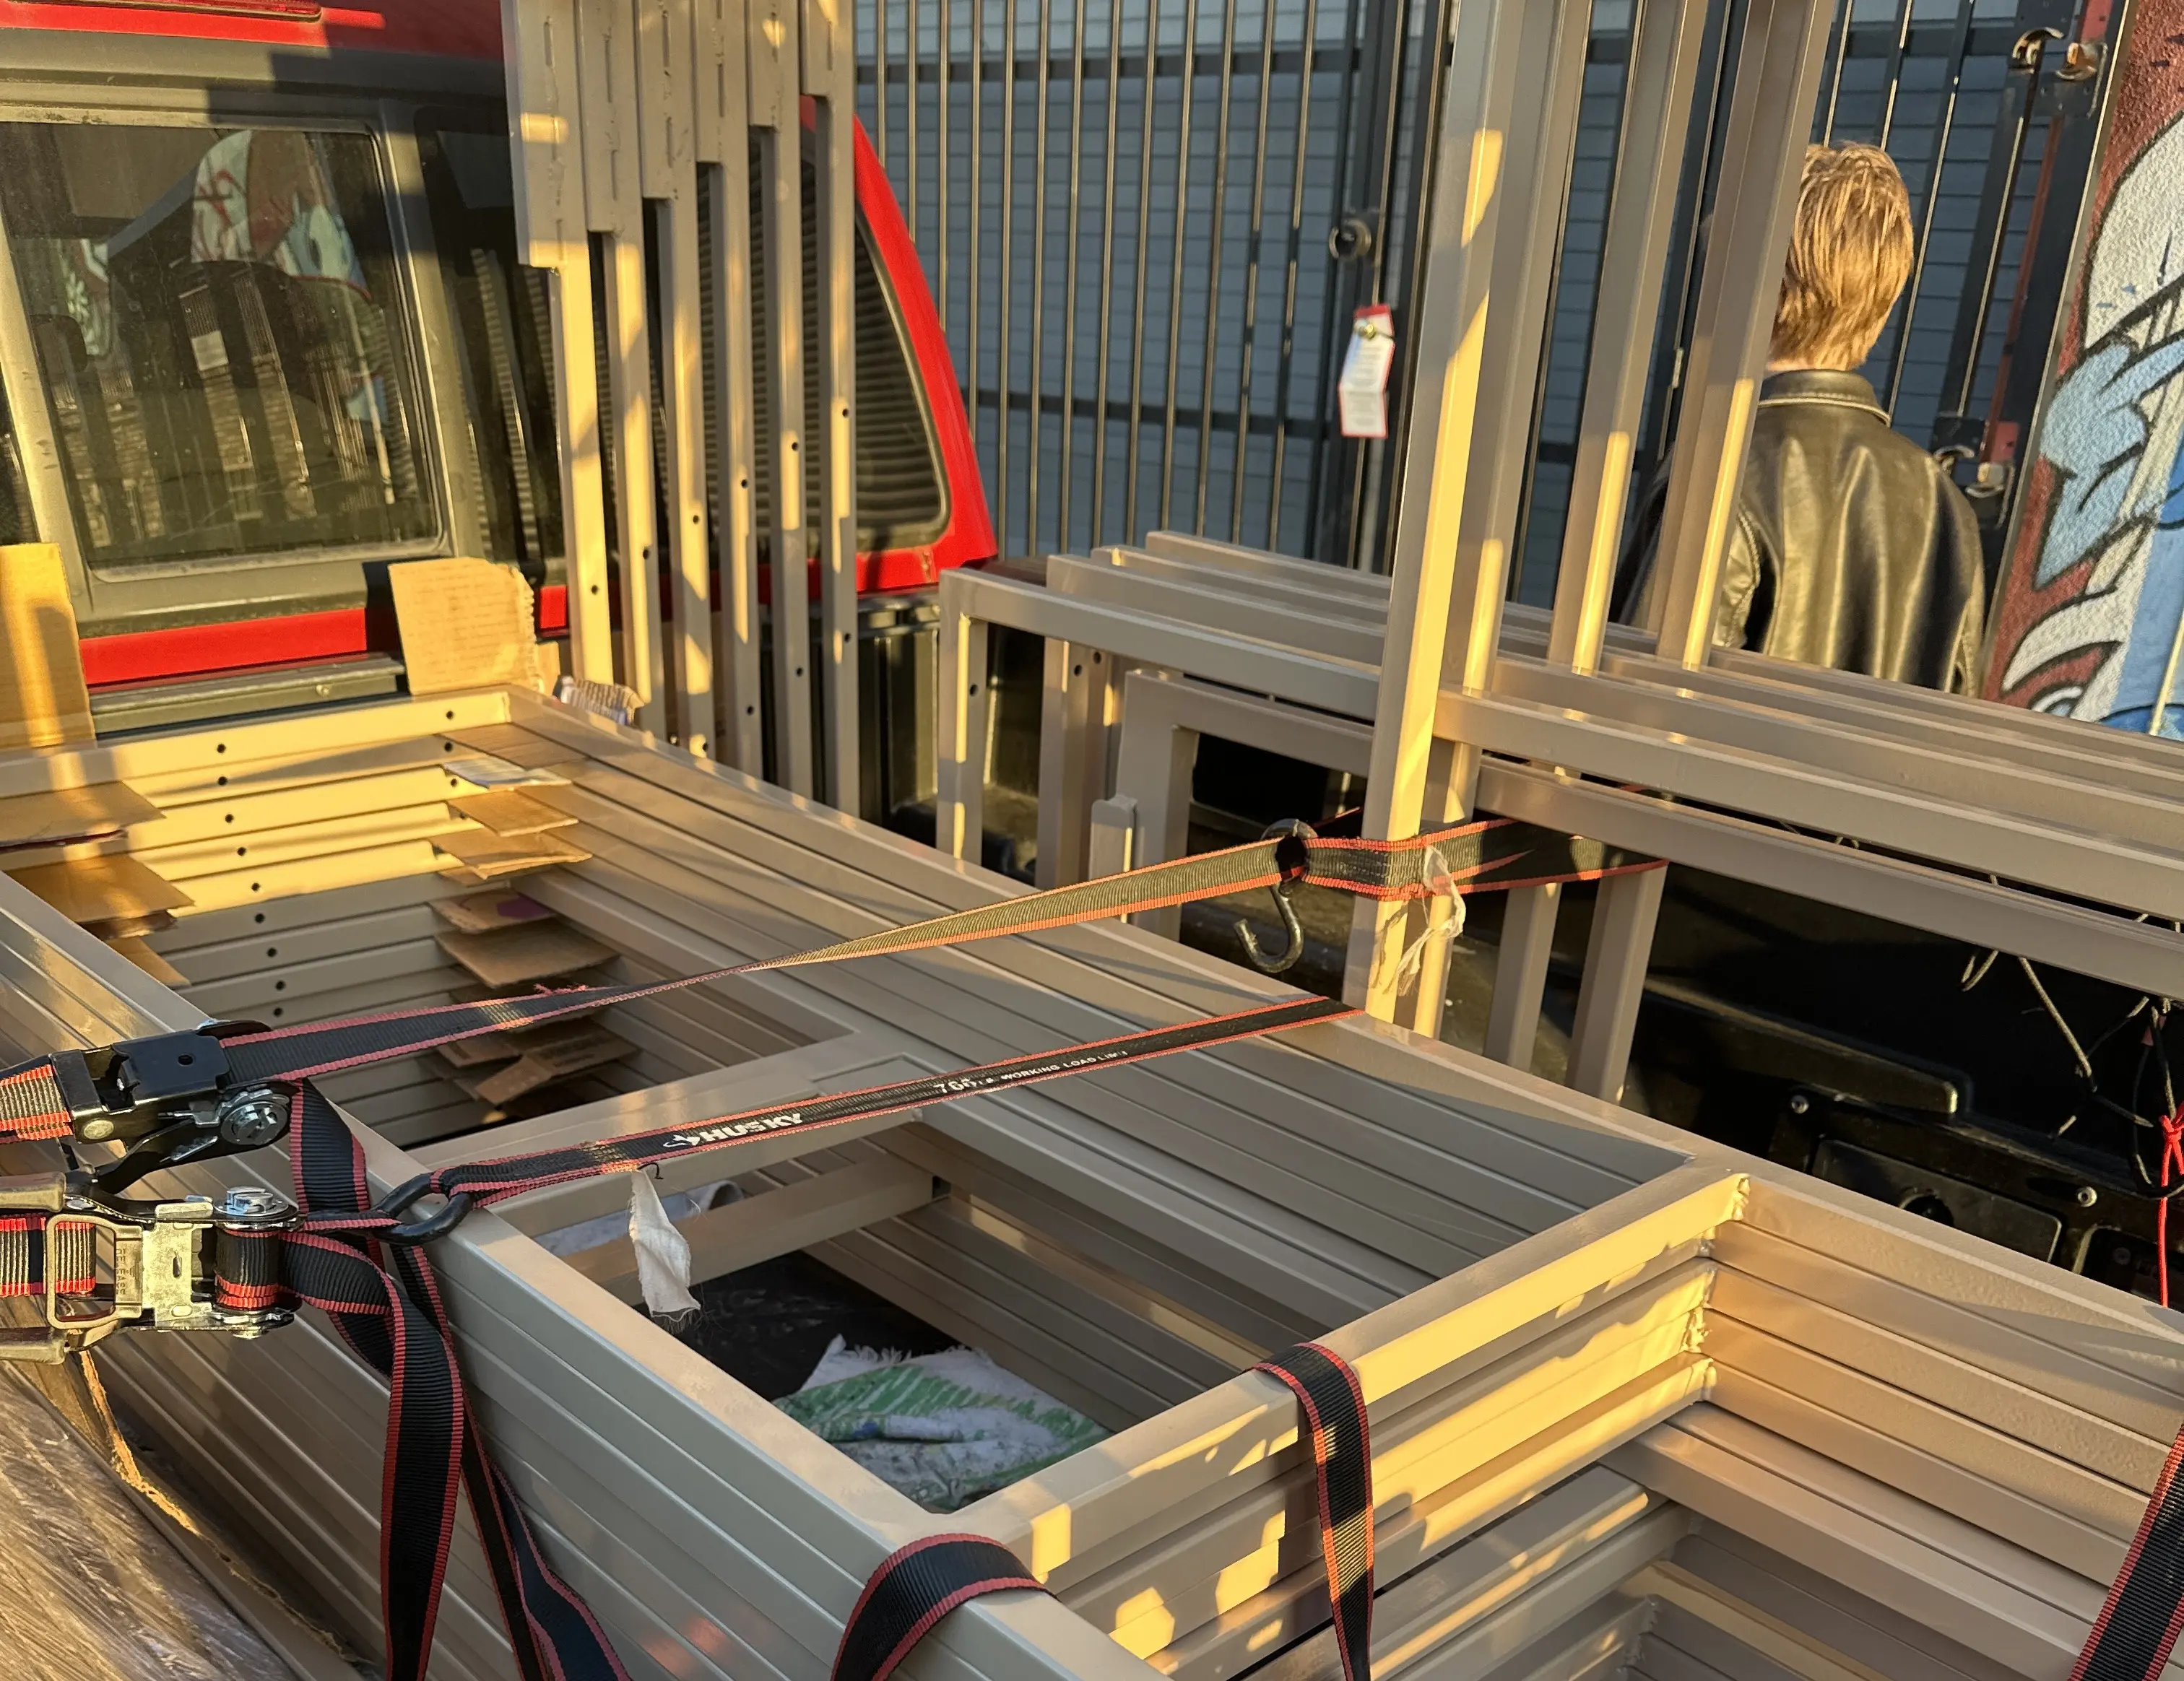
And yes, it did indeed all fit in the back of the truck once grinded and finished.
Next Steps
After completing a dry fit of all the parts in the space, they went off to be powdercoated at Leon's in Oakland. When they came back a week later, powdercoated in military beige (the color of free!), they were once again transformed.
Having completed all the powdercoating, the polycarbonate was also back from CNCing and everything was ready to integrate. I took it to my Scout Hut (the troop has off time during the holidays) and prepared for final integration.

Skinning the walls
Have any of ya'll ever used self-drilling screws? Well then you know they suck! Though I knew that during the desgin process, I could have never expected what we were in for during the almost 9 hours it took us to integrate everything.
Working with a team of several people, we ended up having to pre drill all the holes in the steel, using the polycarbonate sections as a drilling template. The sizing here was incredibly precise. 3/16 was too large, and 5/32 too small. Using #10 self-drilling screws, only an 11/64 hole would create a reliable tap. We also used cutting oil, which further helped reduce the chances of snapping the screws.
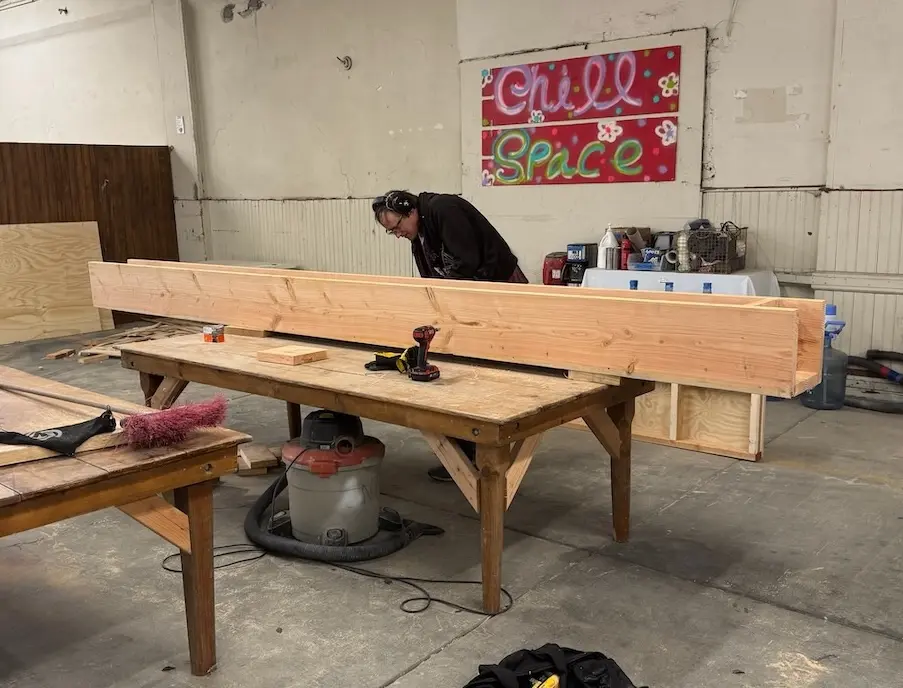
Finally, we were in. After self-drilling and oiling, everything went smoothly. We also cut and drilled the 3/4 inch plywood for the driver station sections and drilled a 2 3/8 hole for some cable grommets.
Getting it all assembled
With the integrated sections loaded into a truck, we headed over to the final space to assemble the walls and feet, which had just been delivered from Fabworks. Since the game hadn't been released, we weren't quite sure how the field would be oriented.
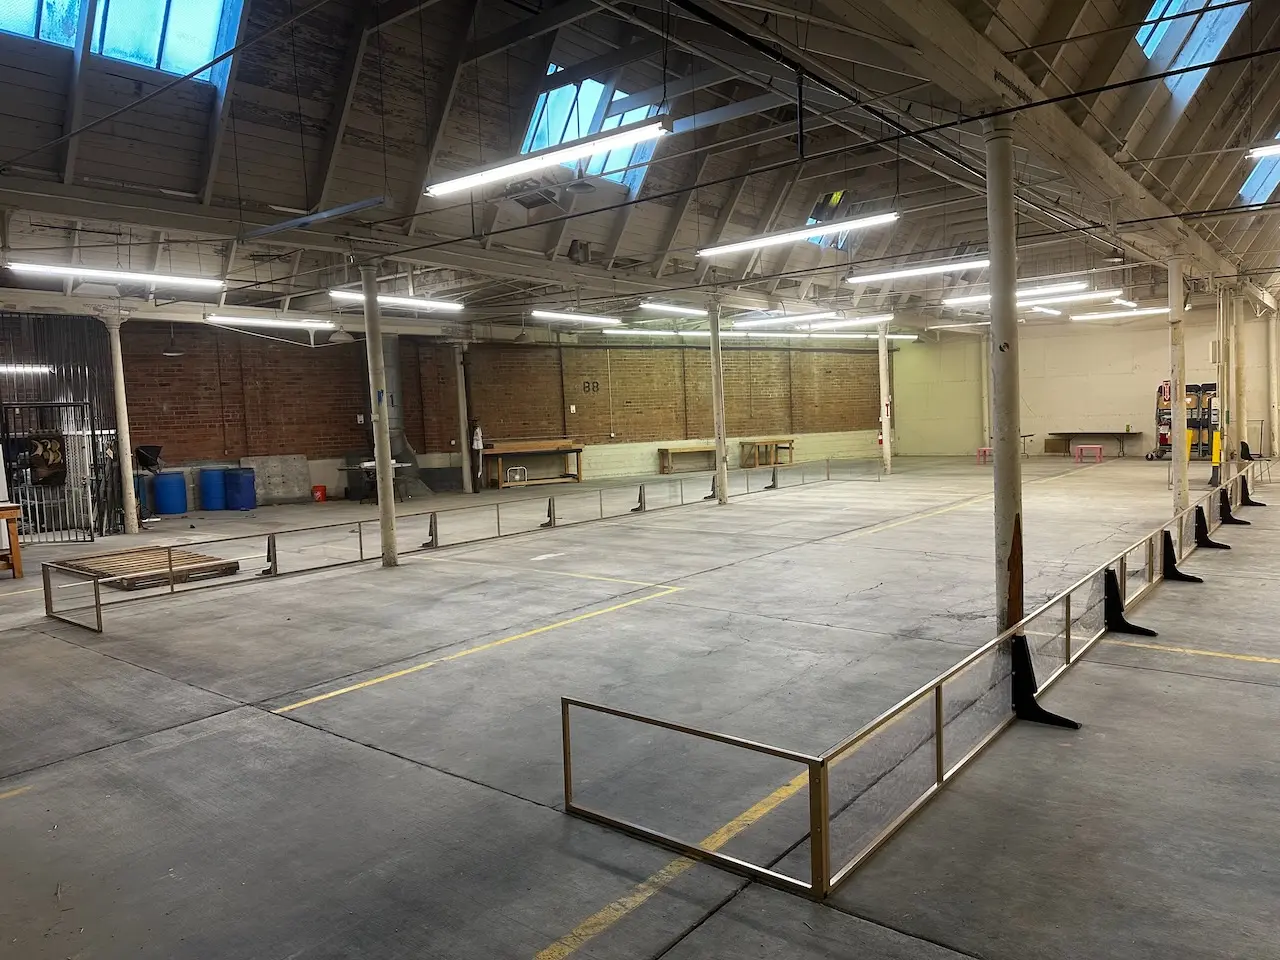
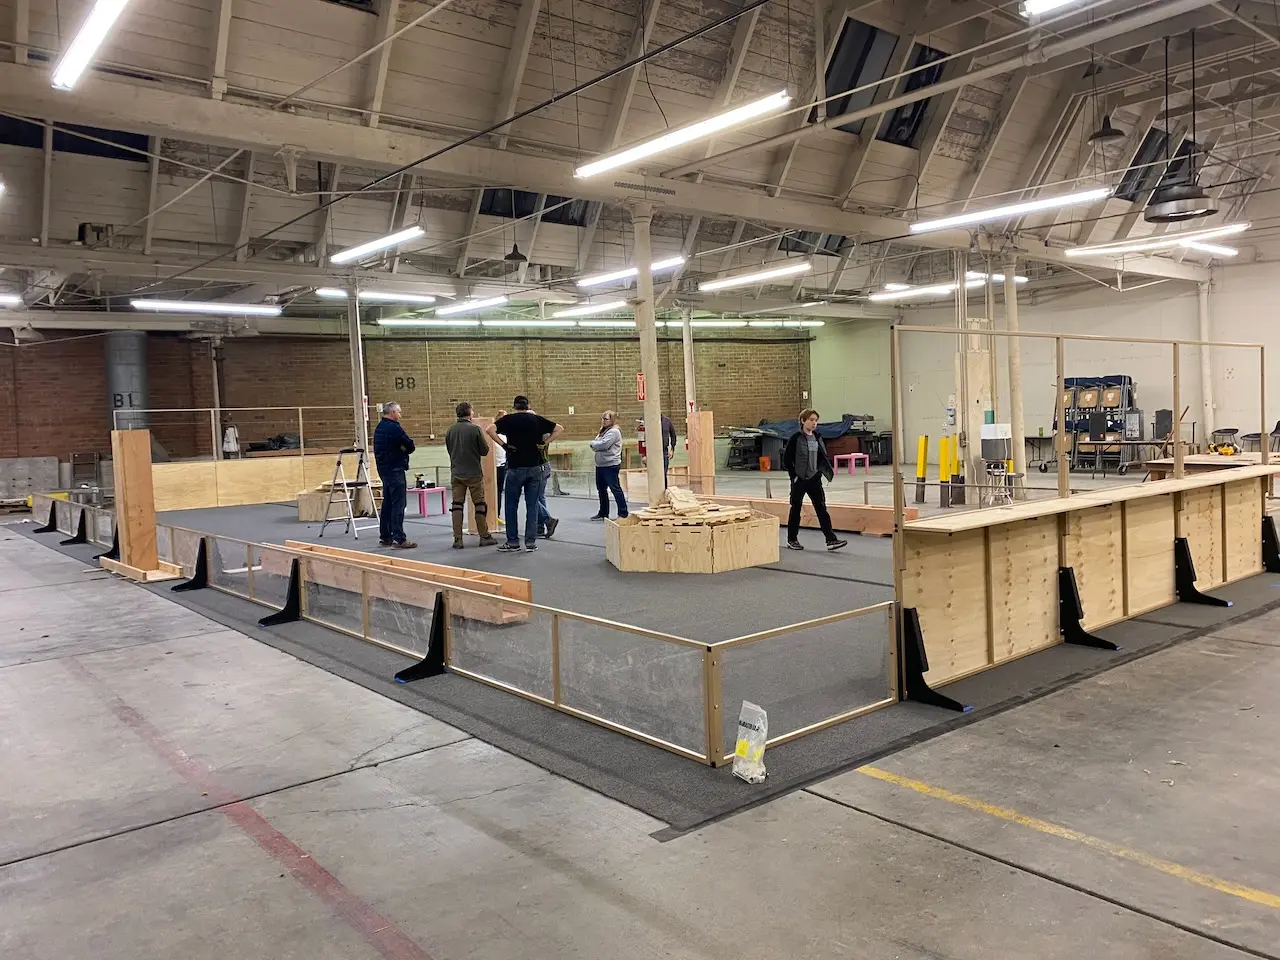
Everything fit together perfectly, which meant we were waiting on the field carpet and game release to go any farther. On January 4th, the game came out, and a week later, we laid down the carpet in the space-two halfs taped down the middle with 4-inch gaff tape. That meant field element construction could begin.
Seeing as I was busy with building 8033's 2025 robot, my efforts shifted mostly to the design and management side as I delegated across a team of ~10 parents and mentors. I designed some of the field elements in Onshape, based off plans from REV robotics, and also got some help from 8033 alum Charlie Lambert, who designed the player stations. The final field element build required almost $5000 dollars worth of plywood, even at an insutrial supplier's best contractor rate. It was truly a project of massive proportions.
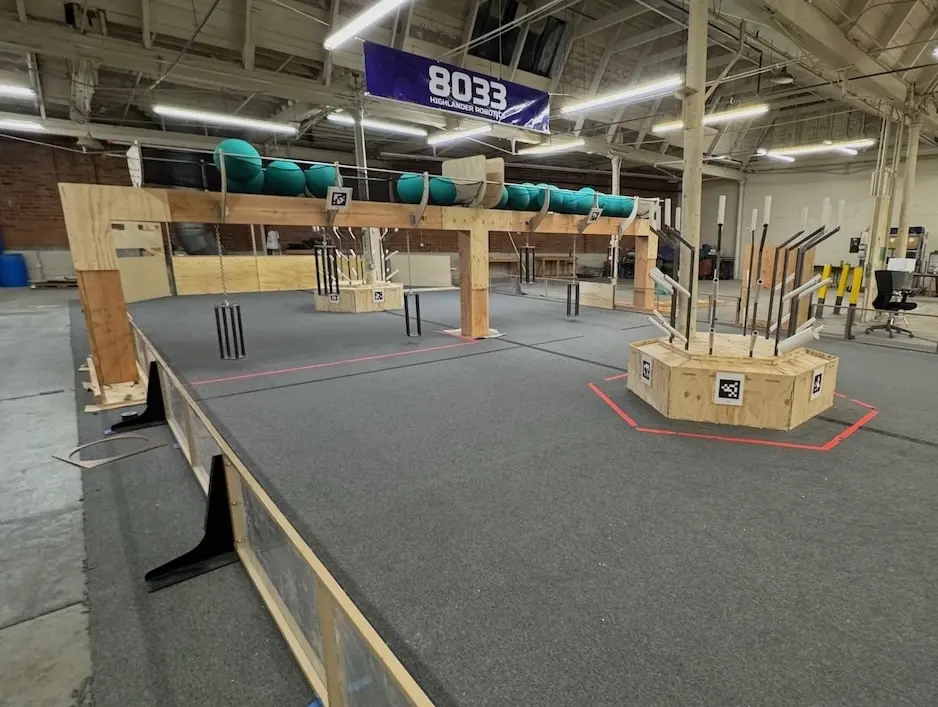
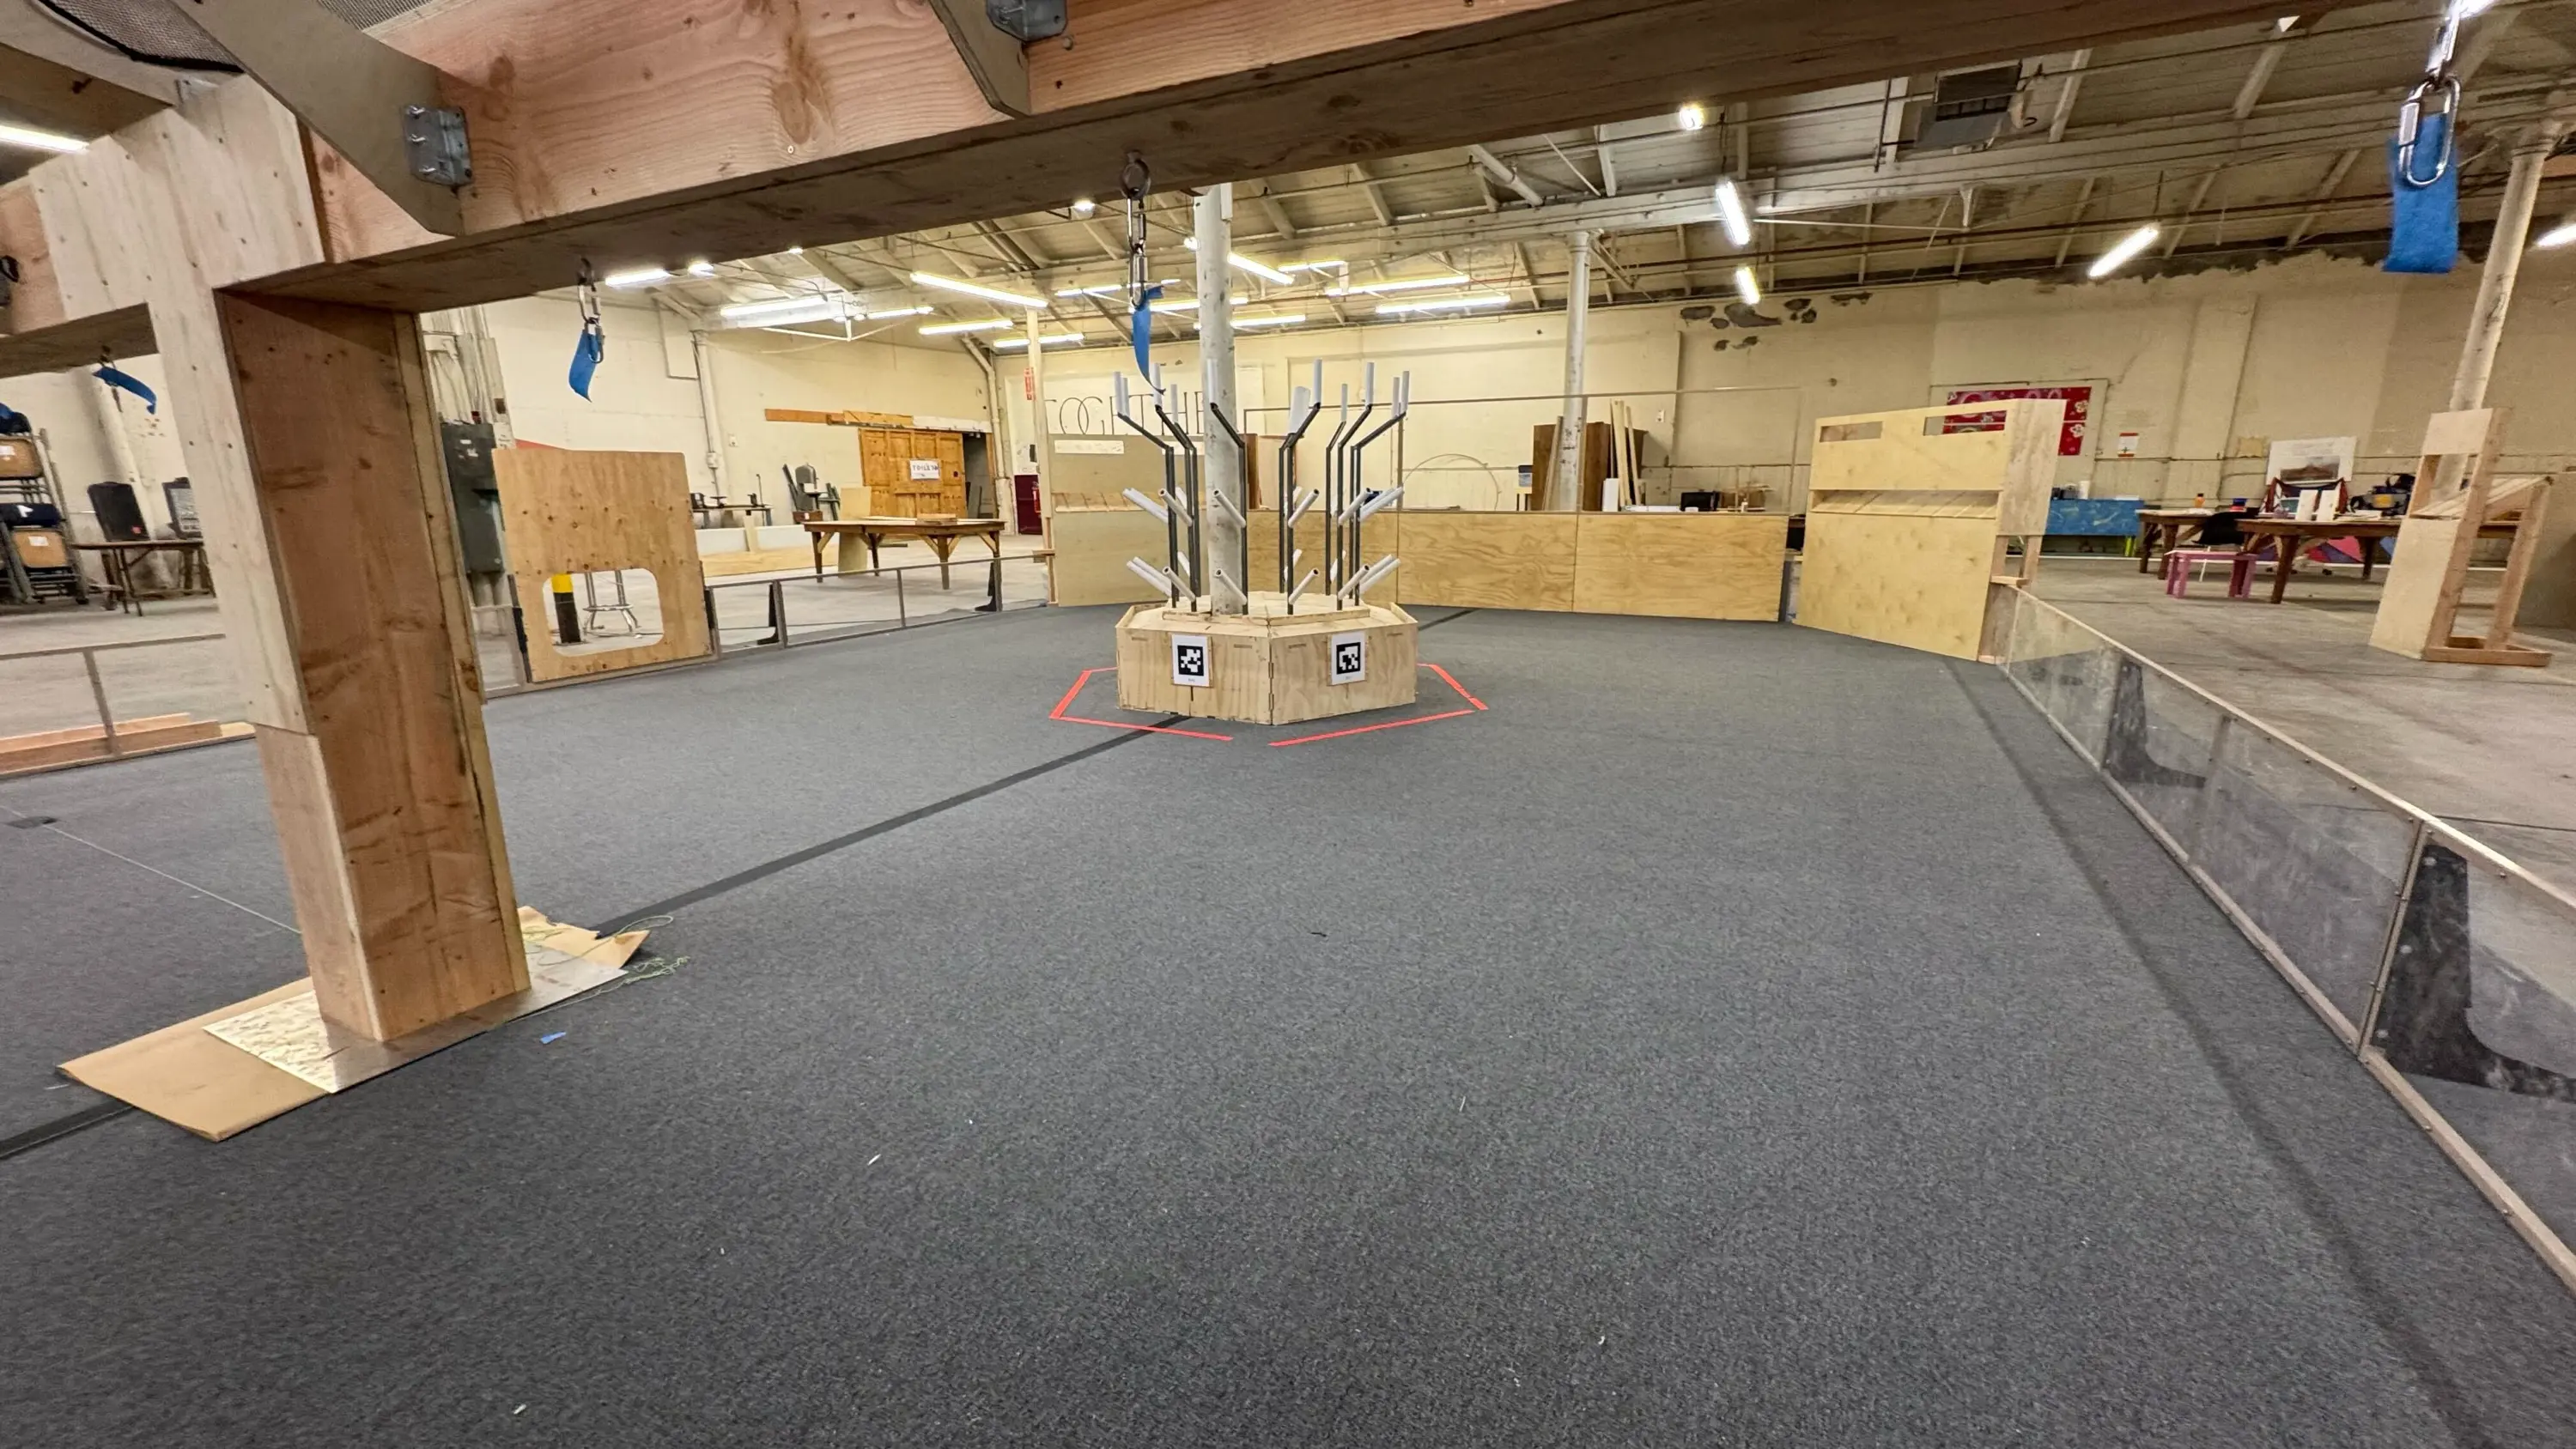
FIRST threw us a massive curveball with the "reefs," hexagonal elements with bent and welded tubes for game piece scoring. Faced with a limited timeline and the desire to build something robust, I designed a version of the reefs that could be built from plywood and welded box tube, which we then put PVC on top of to make it act like the round-tube ones on the real field.

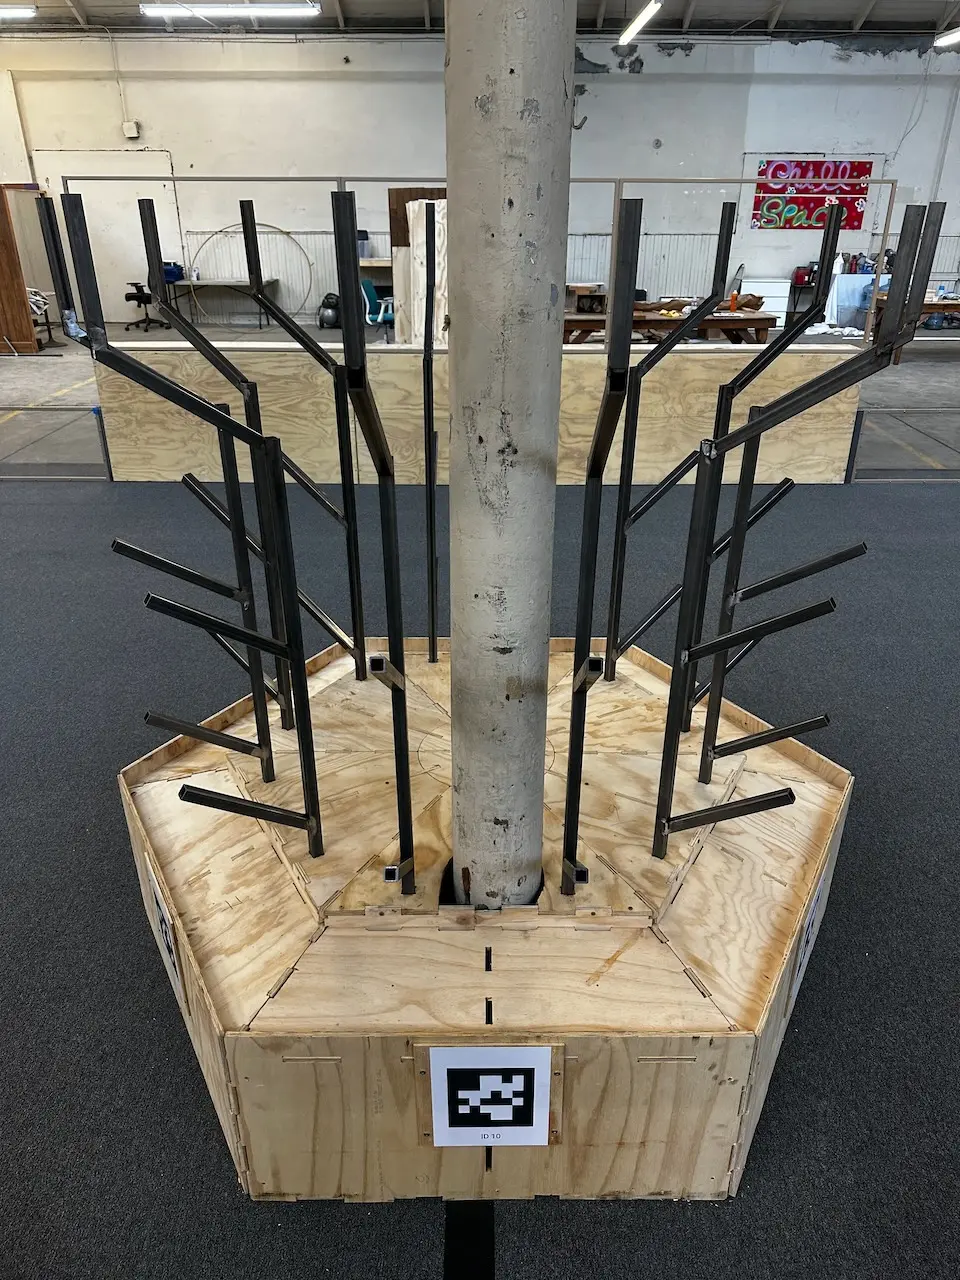
These two REEF structures absorbed the two poles on our field, which was an incredibly lucky coincedence. After a small amount of fitting work, we ended up with a clean field. Final construction went quickly as we integrated the reefs, perimemeter, driver stations, and massive BARGE structure in the center, designed for robots to hang on at the end of the match.
As of last week, the field is complete - and we've been running our Alpha robot there for about 2 weeks now.
Conclusion
As we work towards opening our field for use by other teams, I reflect on this endeavor as easily my largest, longest, and most team-driven project. Even with an incredible team of parent and mentor volunteers, from start to finish it took almost 5 months and would have cost over $50,000 without generous sponsorships and discounts.
At the same time, I believe it was worth it, and I'm super proud of how it came out - especially the little details, like the cable grommets, rubber plugs pressed into the exposed tube ends, steel reef trees, powdercoated feet and precisely located Apriltags. It really appeals to my perfectionism.
I am incredibly proud to leave 8033 with this field as I complete my last year here. I believe it will continue to serve us and the teams in our area for 10+ years to come.
If you made it this far, thanks for reading; I hope you enjoyed!