Functional Product Concepts
PowerPlay
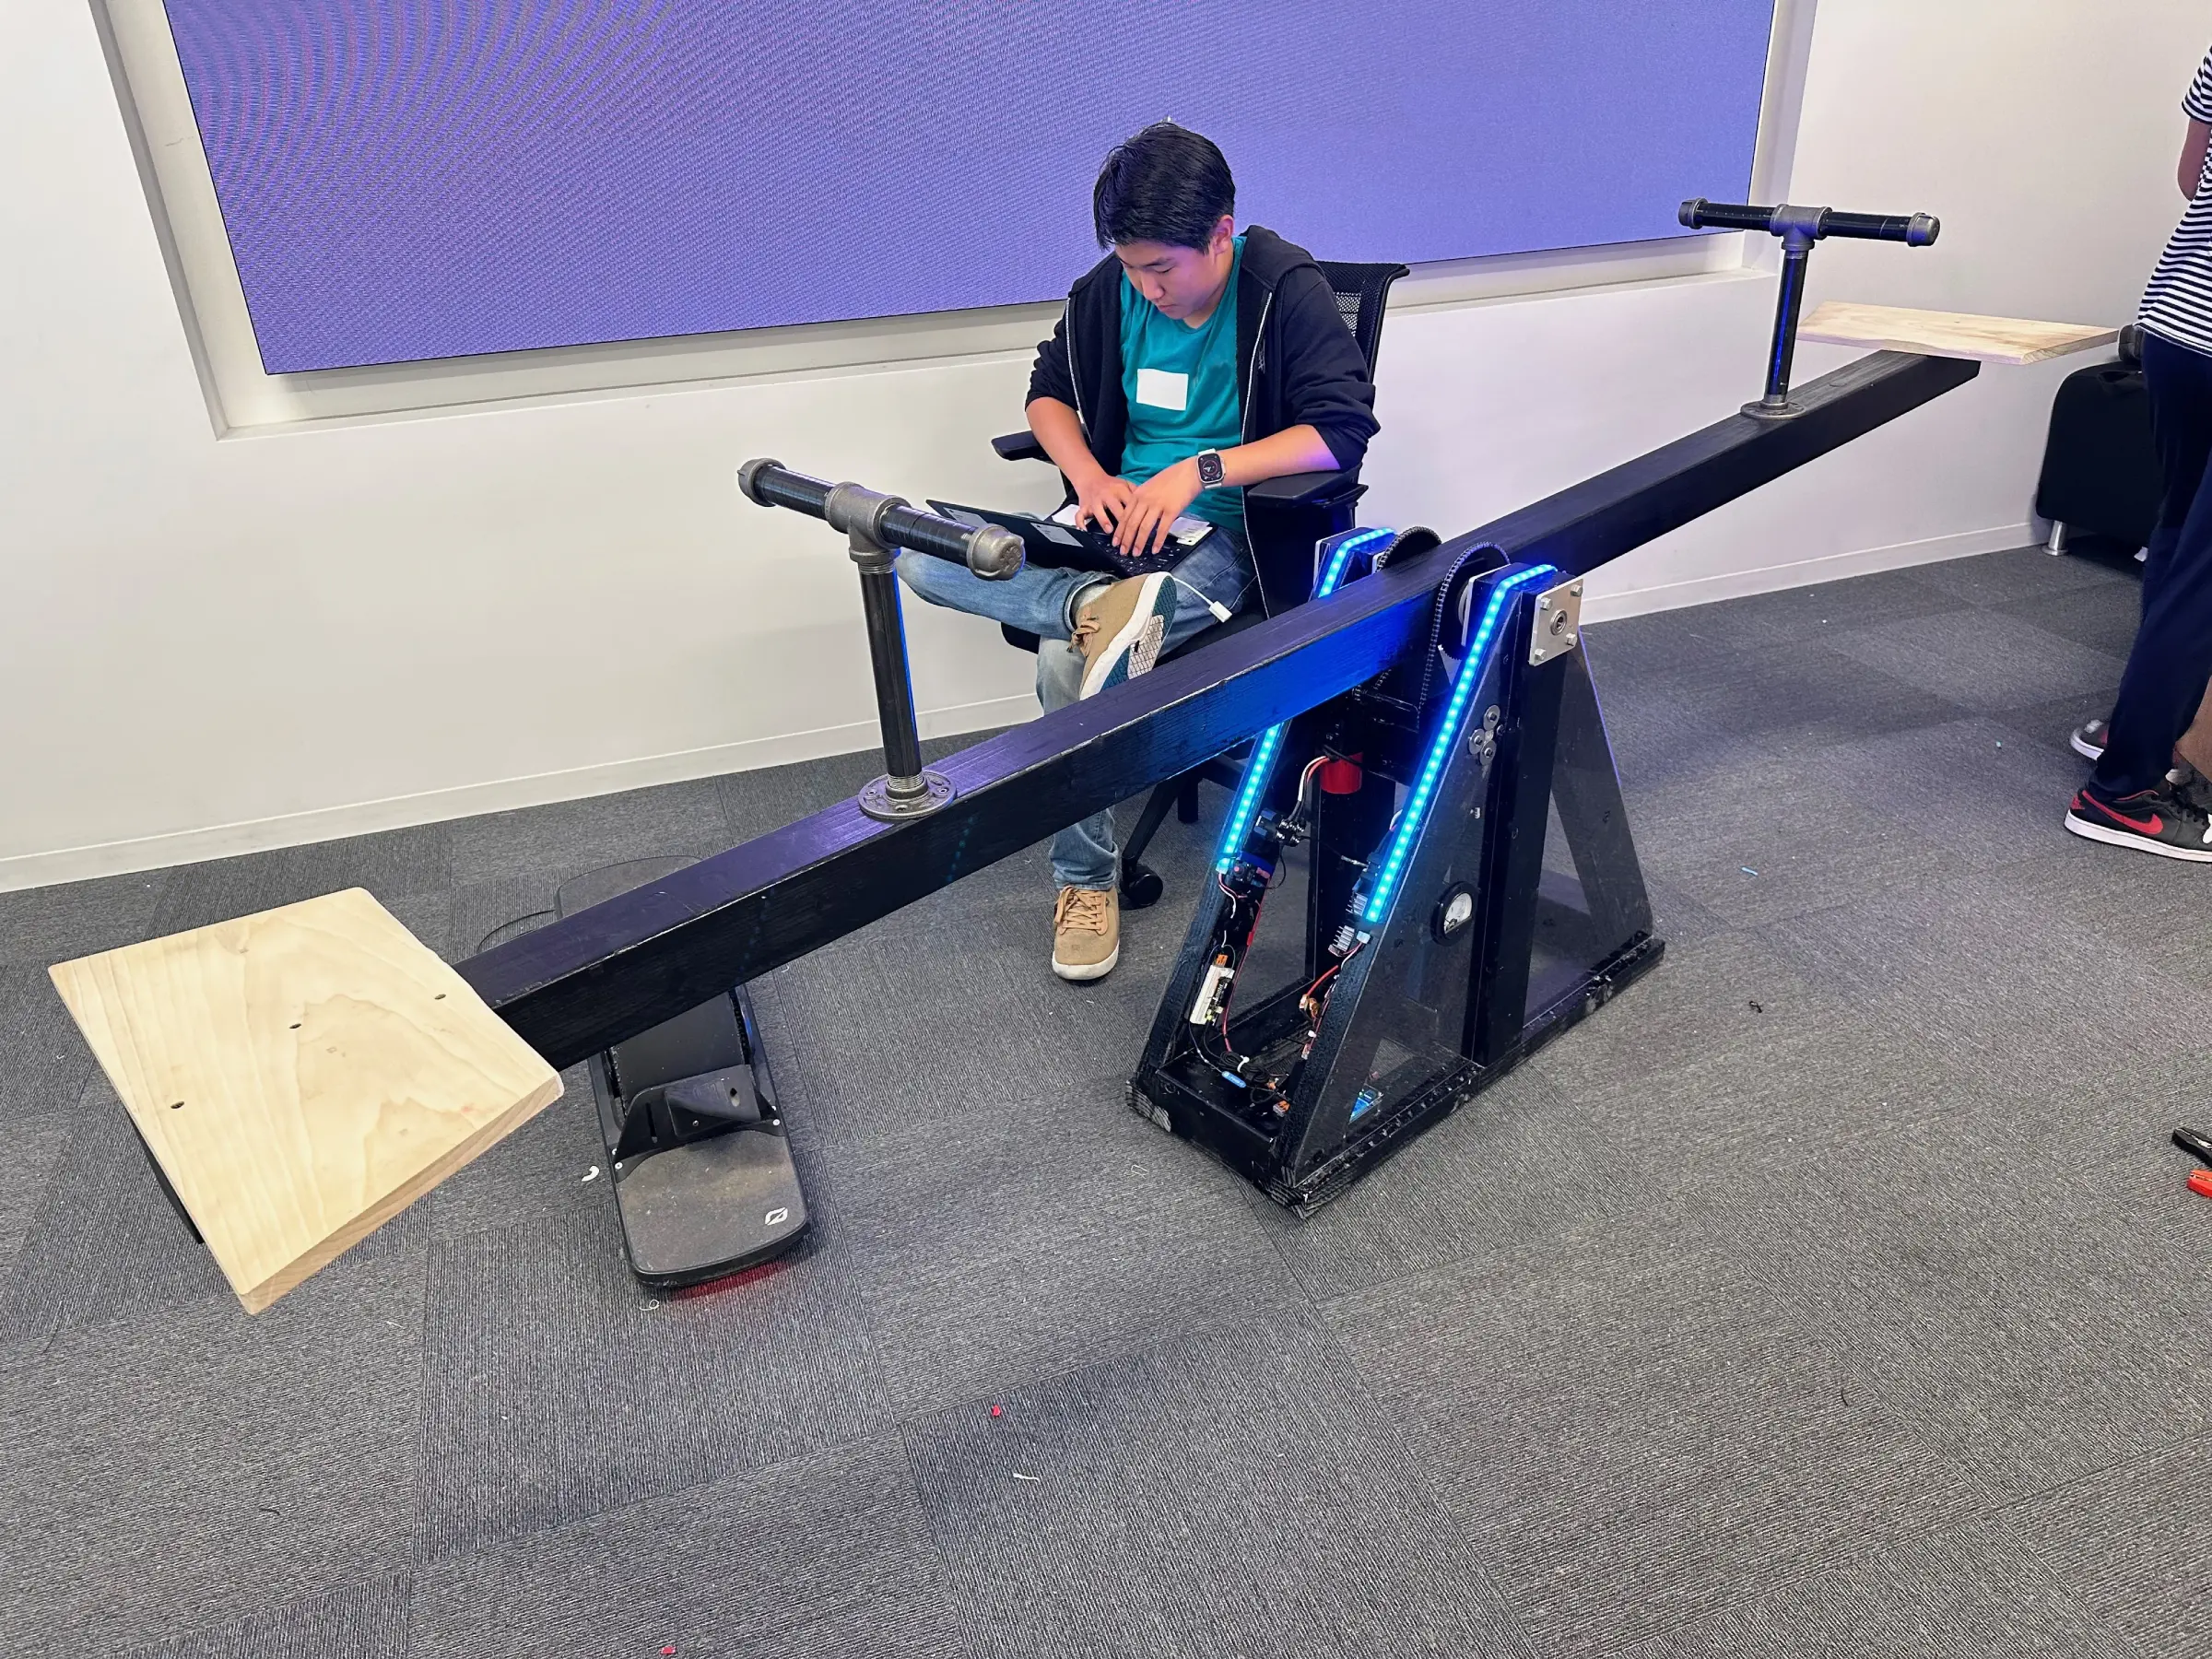
Completed PowerPlay prototype, running on internal super capacitor bank
Summary
PowerPlay is a see-saw that generates electricity, lights up, and connects to a cloud backend and social app. I worked with four amazing team members to build PowerPlay at a 6-week summer program in 2023, where we were challenged to build a product related to social sustainability.
PowerPlay was designed to address declining attendance of kids at parks and public spaces in a day where digital distractions are readily available to younger and younger children. It aimed to flip the problem on its head by allowing kids to download an app, compete with friends on a leaderboard, earn day streaks, and make friends with a mascot — all by generating power at their local playground.

It sounds like a crazy idea because it was. Even so, we carried the project as far as we could — and ended up with a novel solution that impressed the board of executives in our final presentation. Perhaps PowerPlay's greatest strength was the statement it made by flipping the "screen time problem," one that people often ignore as "just the way it is these days," on its head, and going out there with a really bold solution with the potential to spark real change. Working on it raised more "what if we-" questions than anything else I've built — many of which I'm still thinking about.
I was responsible for PowerPlay's hardware and electronics. The frame was constructed from redwood lumber, and the electronics stacked around an Arduino MKR WiFi 1010, able to communicate with our backend and read data from a wattmeter on board.
Hardware
We actually weren't entirely sure whether PowerPlay would be a see-saw. We considered many different play structure elements, including swings, which showed serious promise. After much whiteboarding and napkin math, we settled on the see-saw because we thought it would be something we could build in a conference room — the only space we had.
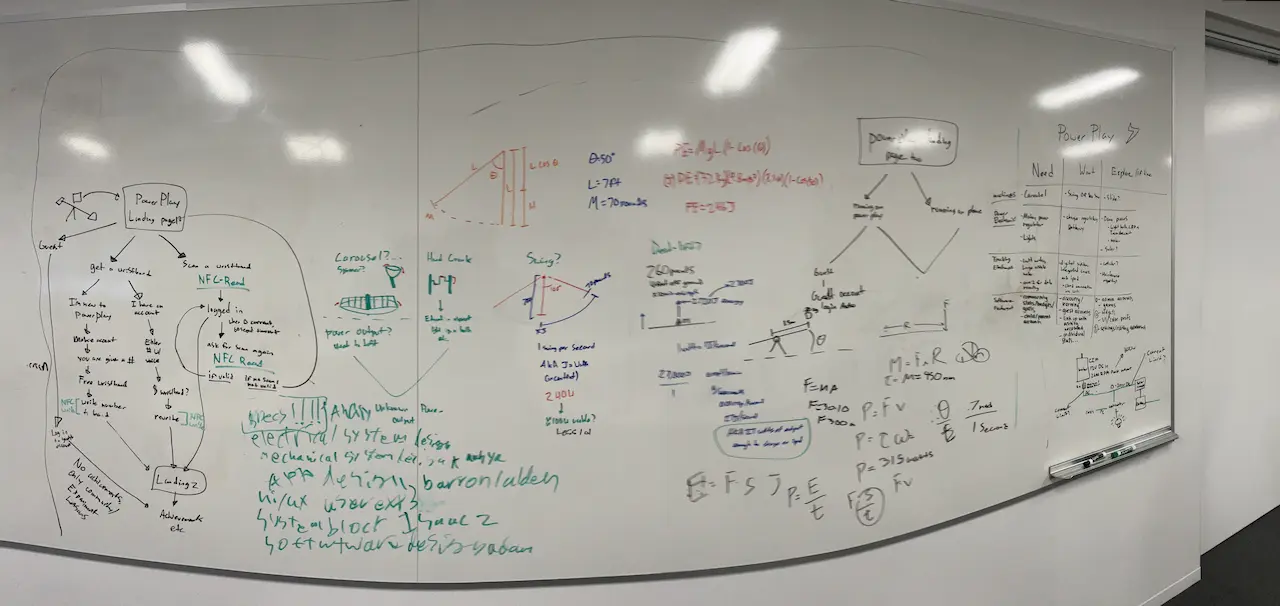
Early math and ideas for PowerPlay UX and hardware
Yep, that's right. We only had a conference room and a parking lot to build this thing. Where did we get the tools, you ask? Well, Home Depot of course. There was one only ten minutes away! How long did we have to build it? Less than 4 weeks.
In any case, I knew that the only way PowerPlay could be built was by spending the extra time upfront in the design and architecting process to ensure our prototype would go together on the first try. Like many of my other projects, I placed the emphasis on simplicity and part count when designing PowerPlay and its electronics. This emphasis was probably the only thing that got our prototype out the door on time.
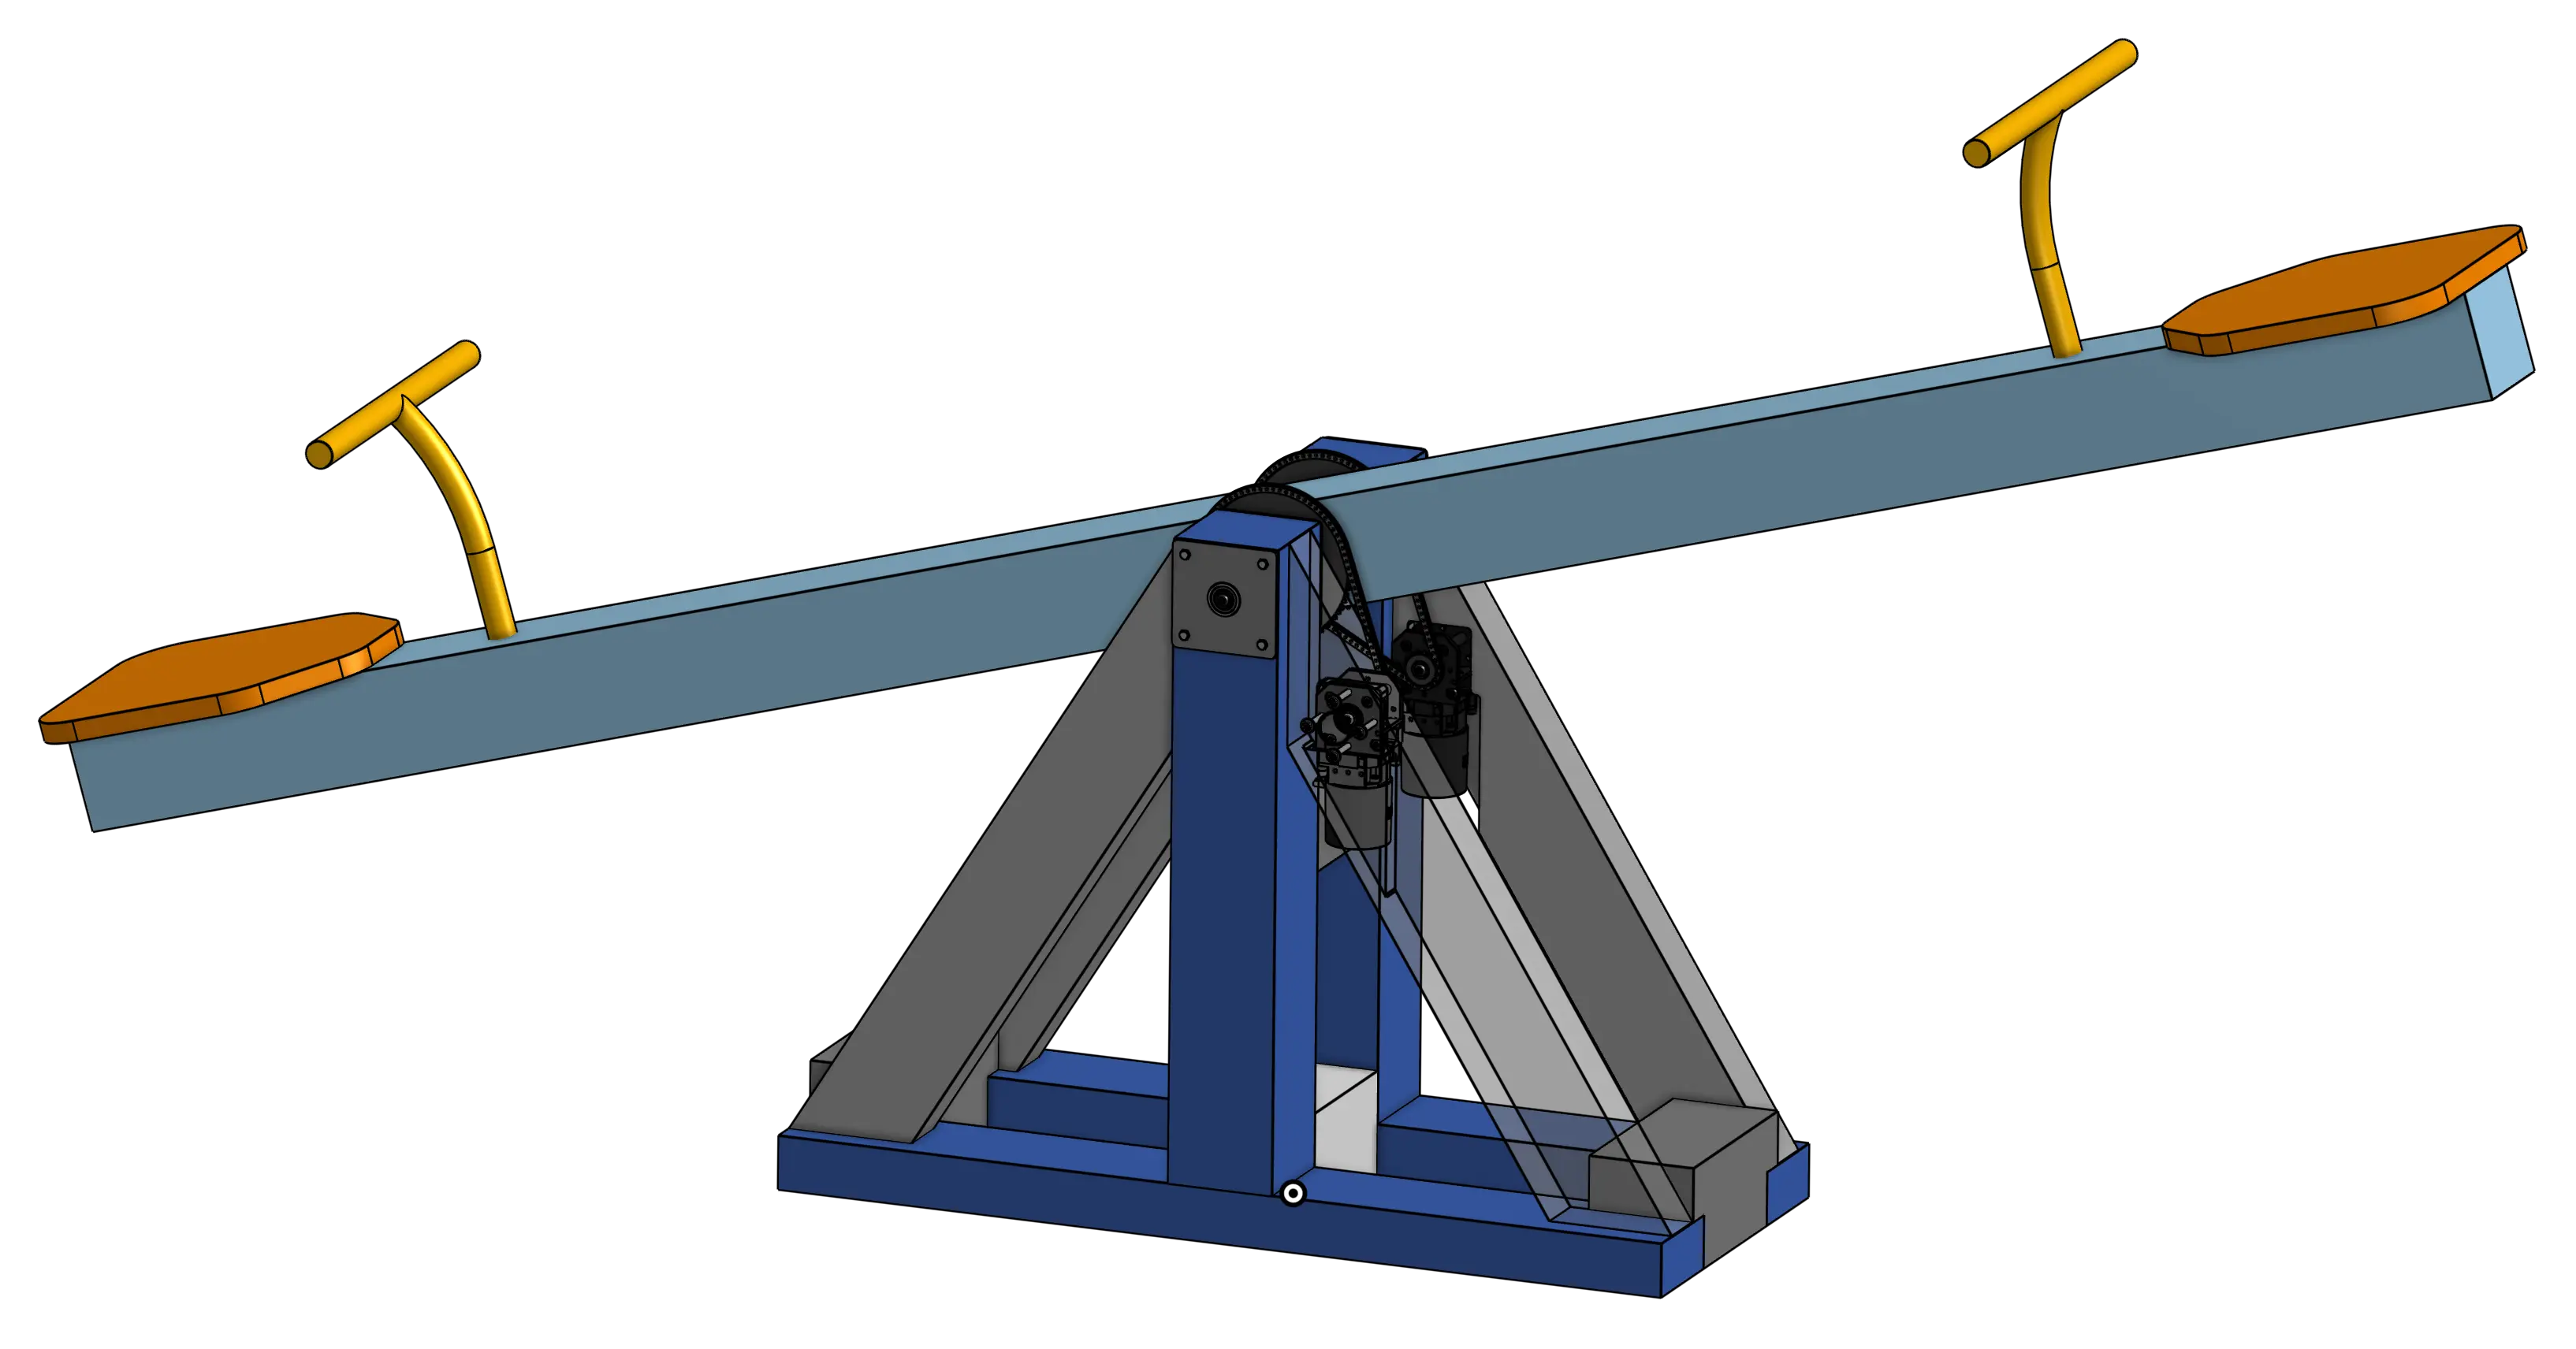
At its core, PowerPlay's final design consists of a wooden frame, assembled with glue and deck screws, combined with some waterjet-cut aluminum elements, brushless motors, planetary gearboxes, and some chains to transmit torque. In the final design, the two brushless motors are wired into three-phase rectifiers in series, which generates about 35W of 12v DC power at full tilt. That also puts an incredible amount of torque through the system, which made designing for simplicity even more difficult.
Early on, I considered a somewhat complex double ratcheting mechanism that would turn the back-and-forth motion of the see-saw into continuous rotation that could spin up a flywheel.
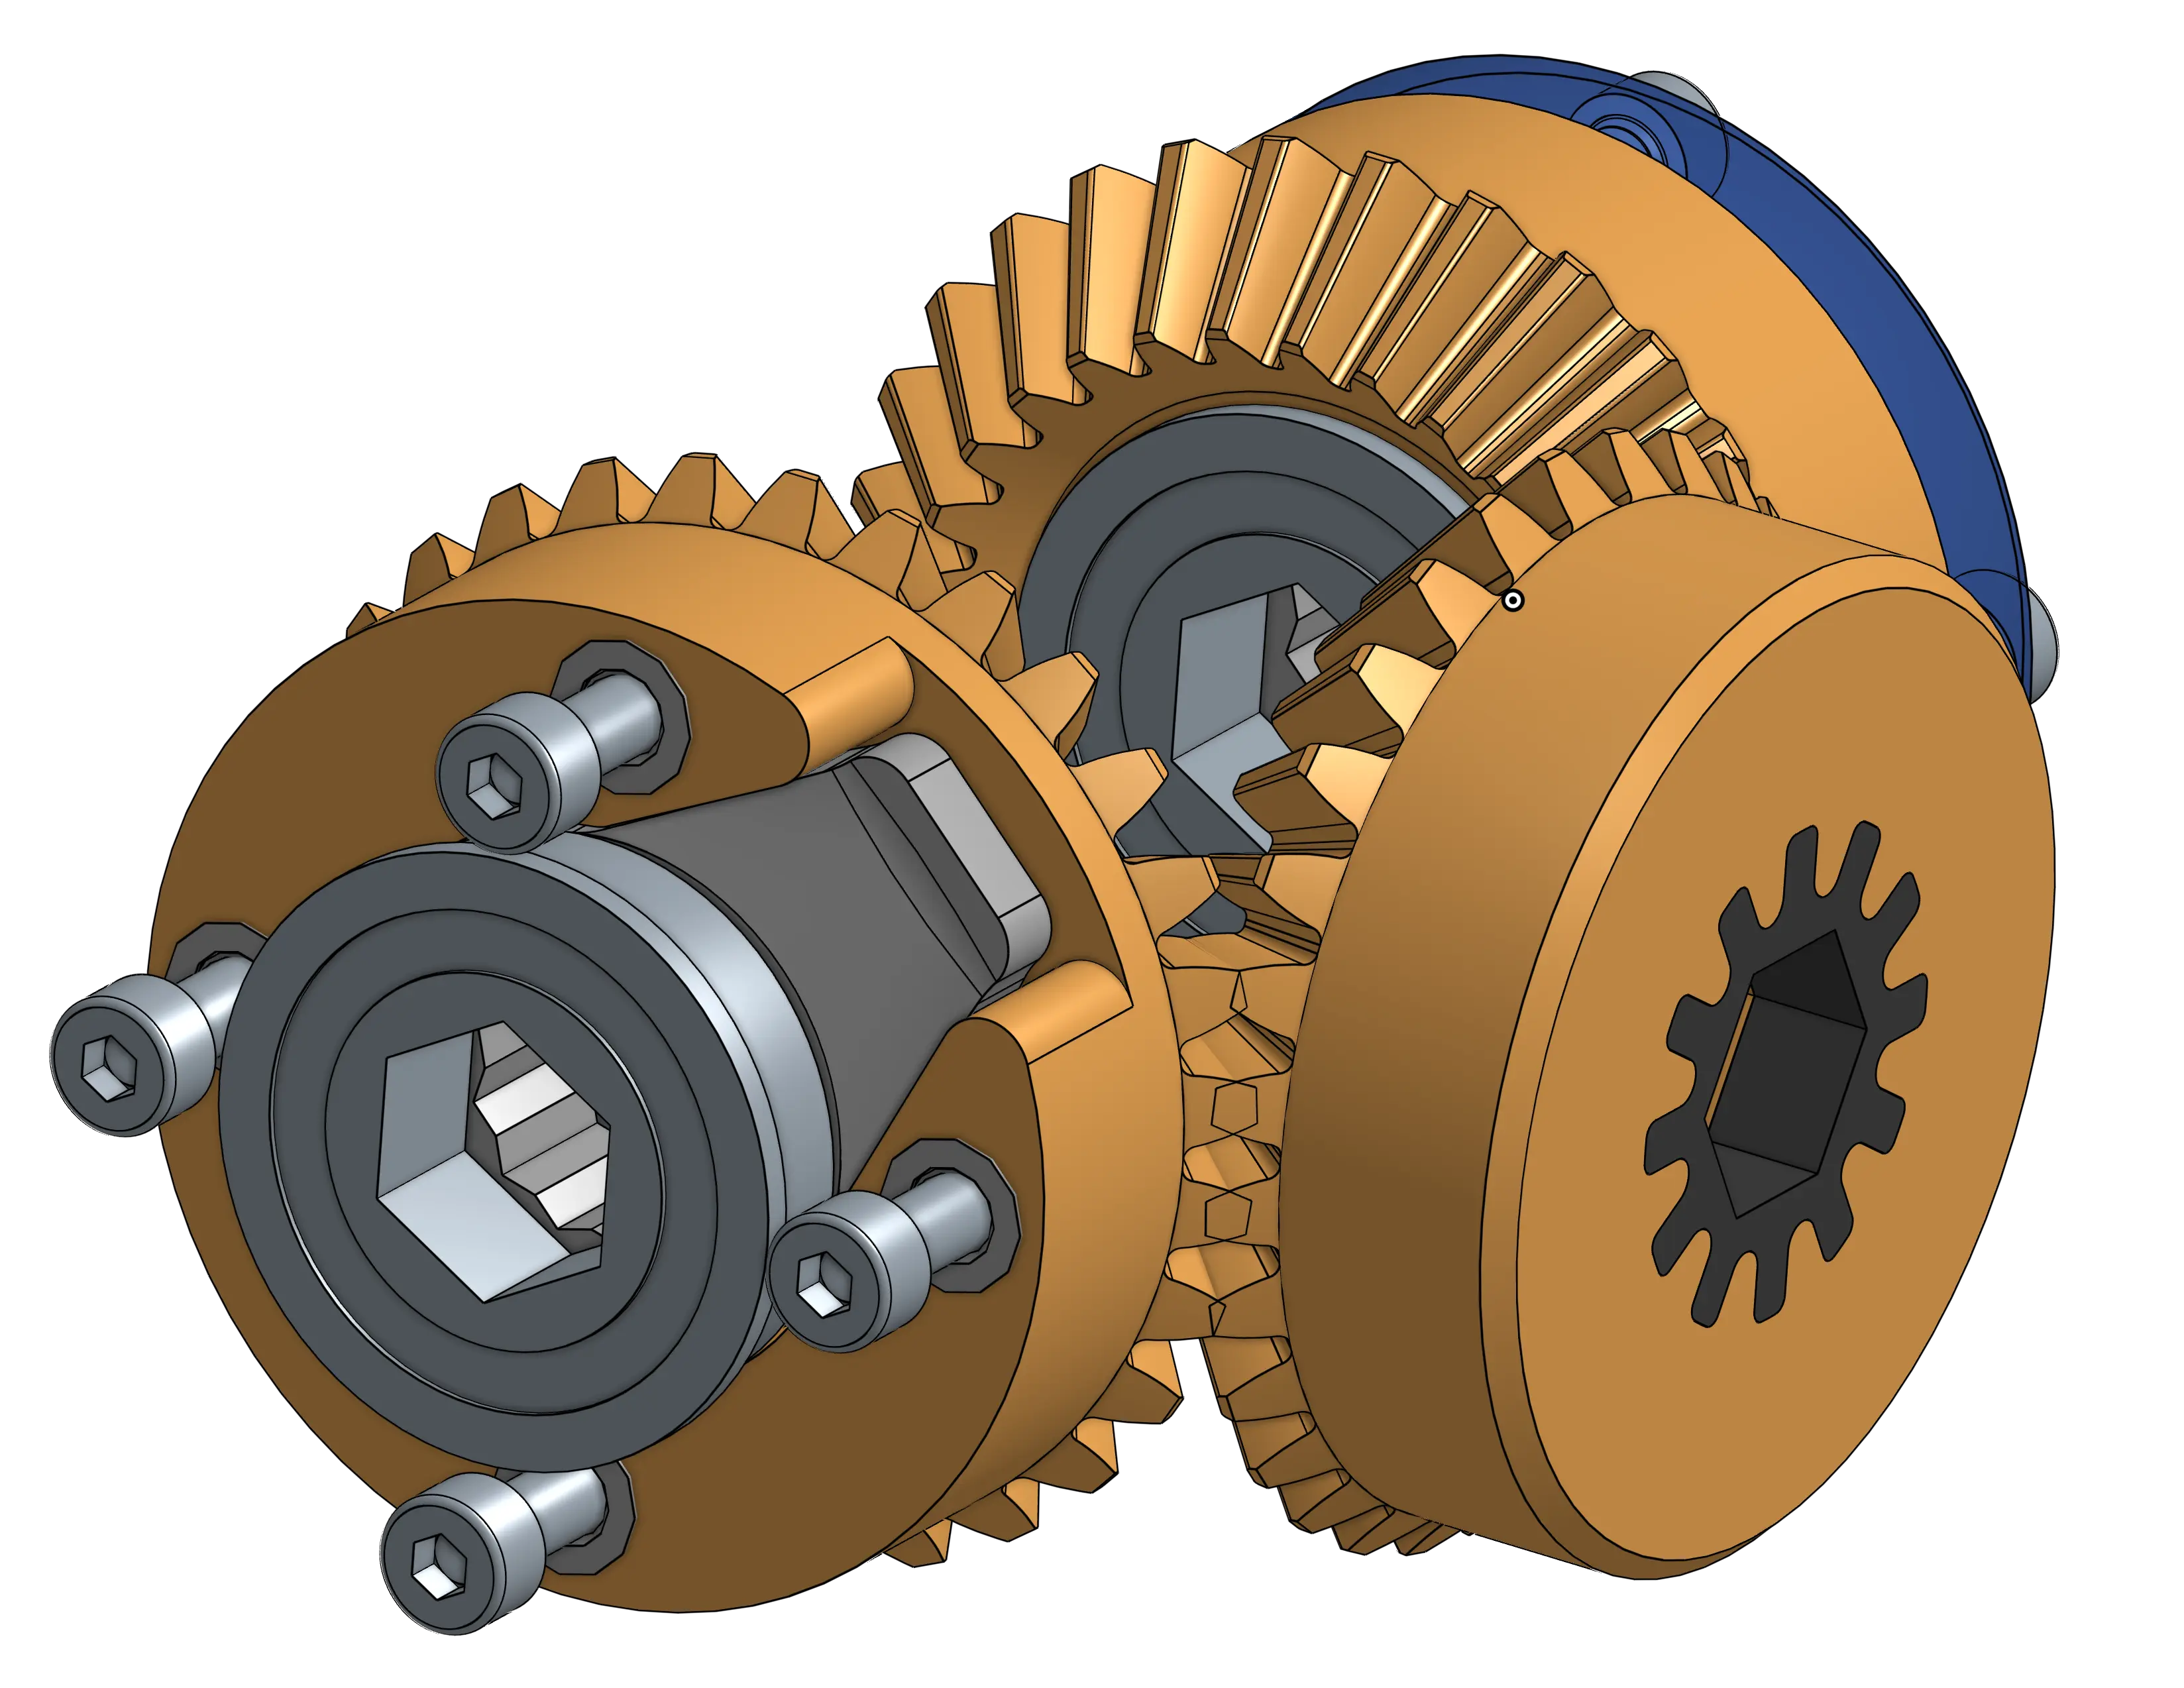
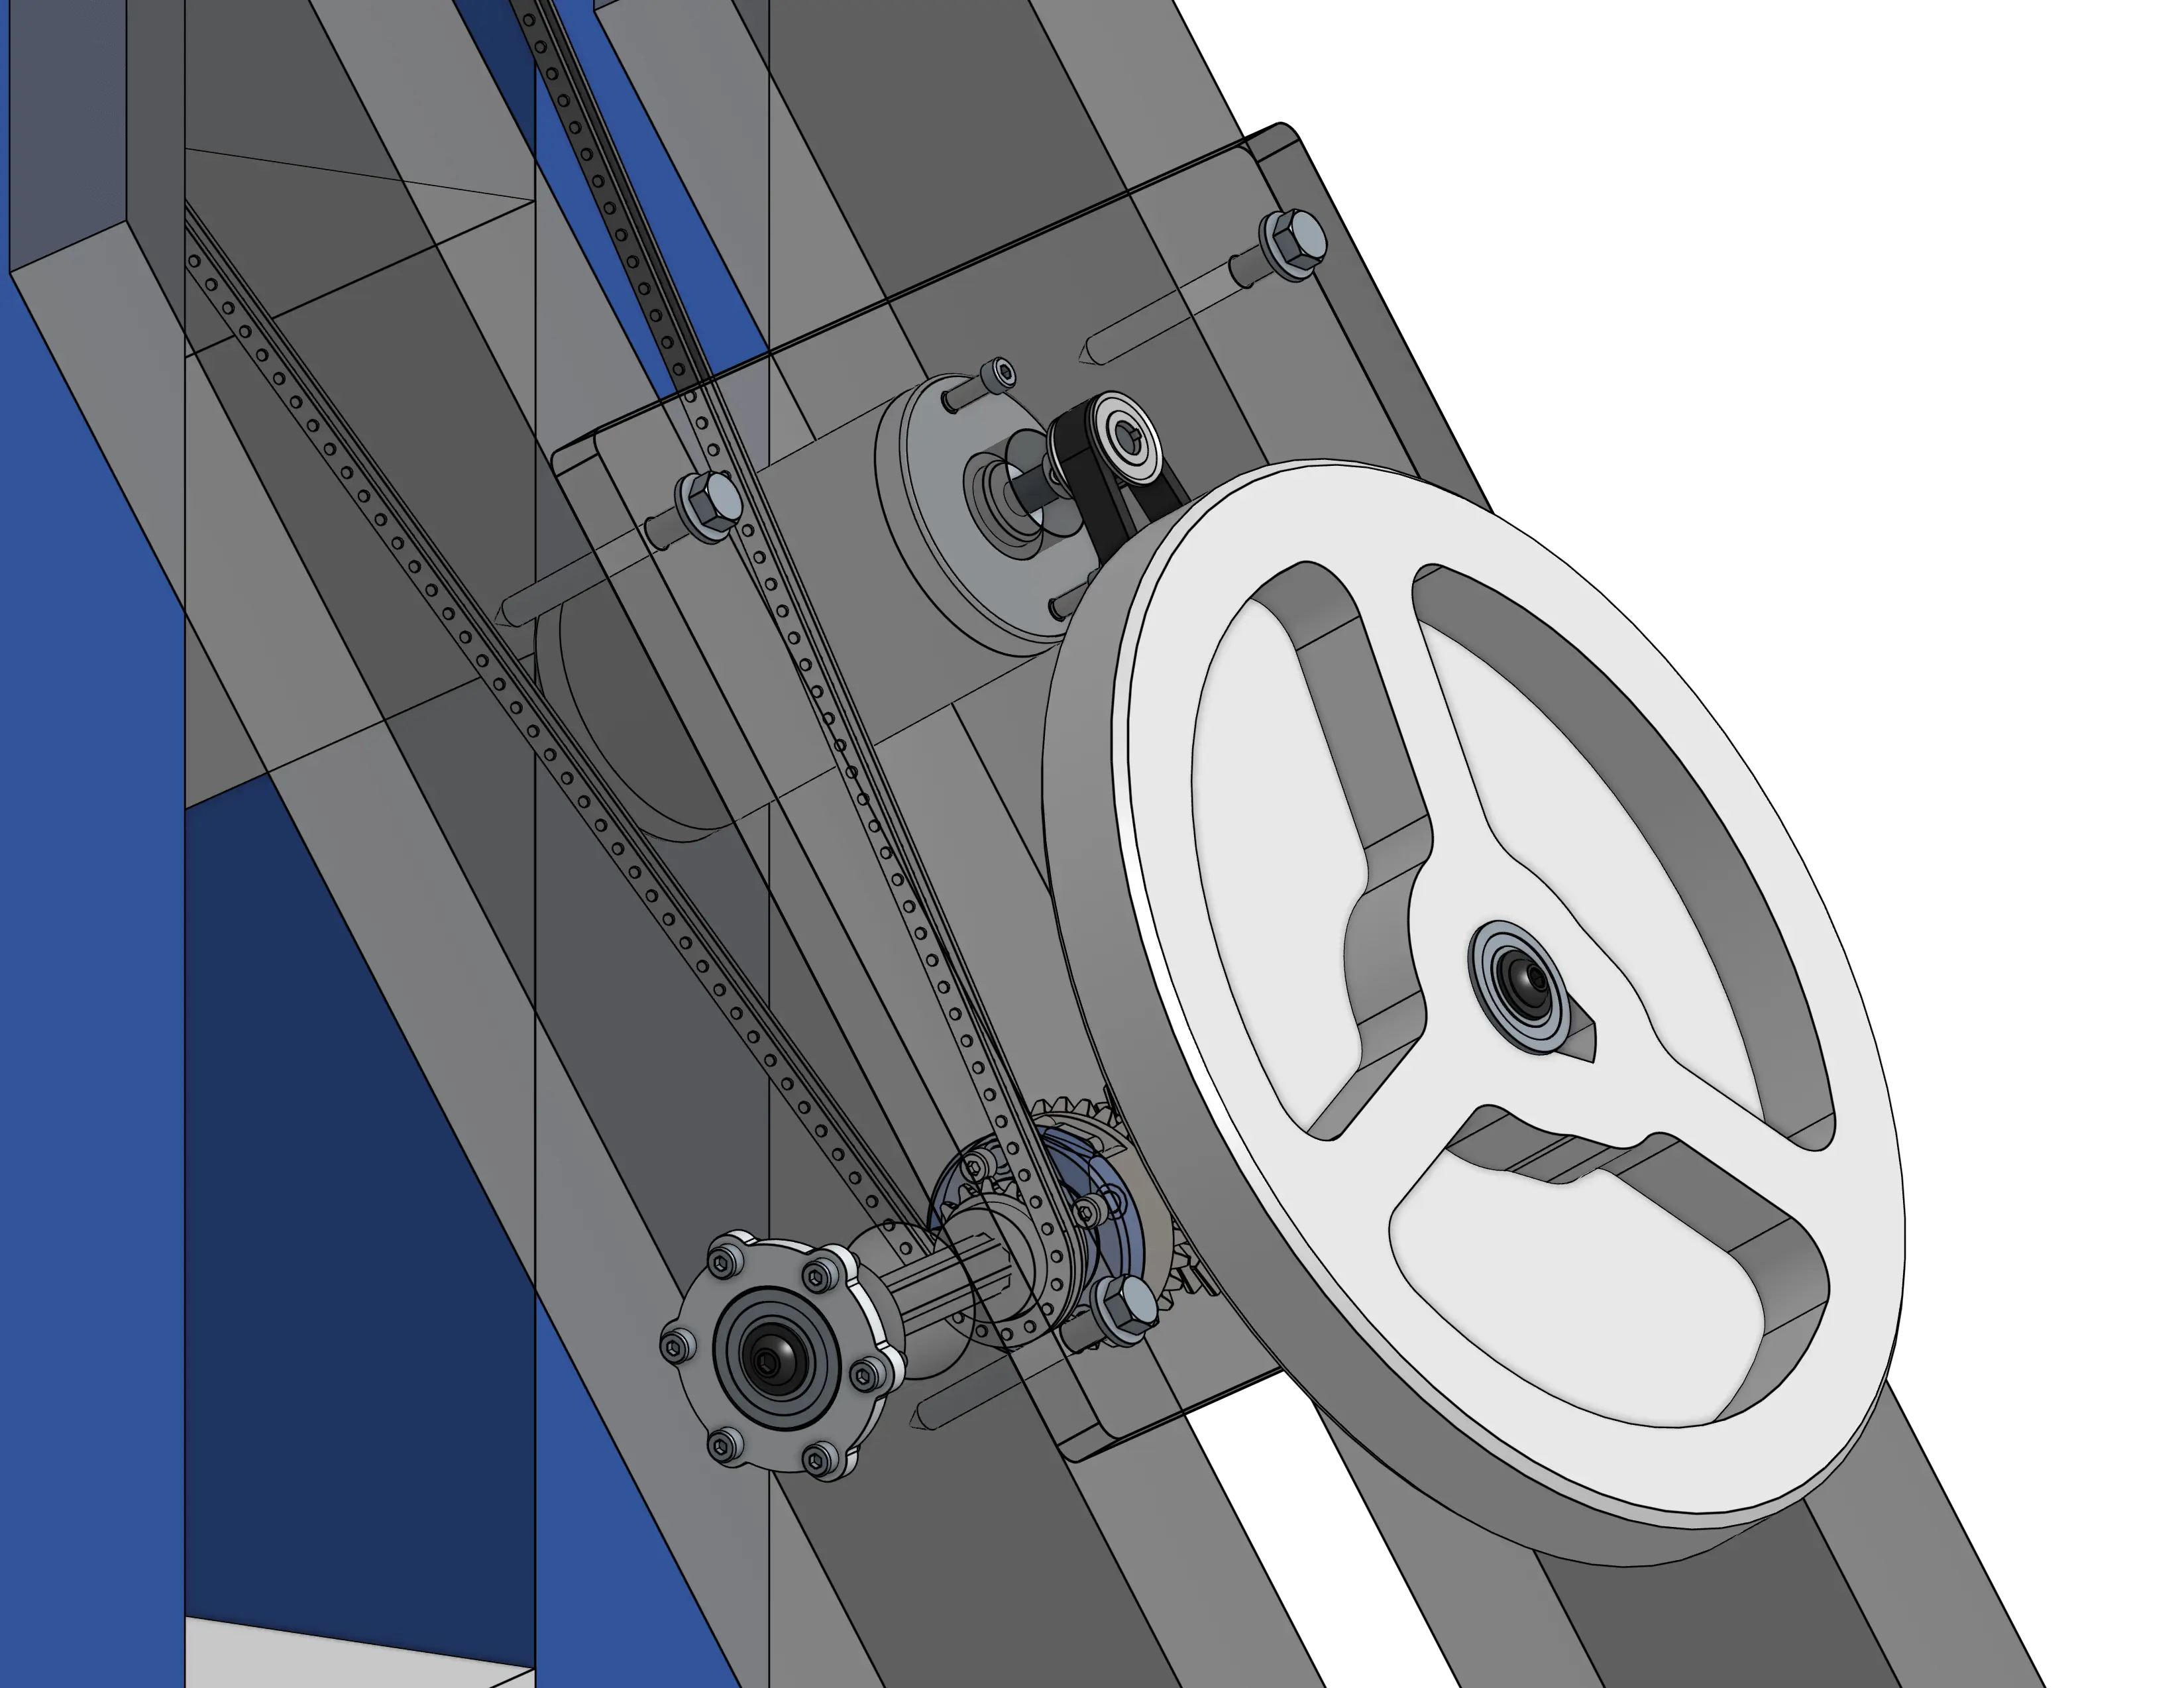
Early prototype CAD, ratcheting gears would turn all rotation clockwise
This system, while really cool, was a mechanical solution to what was really an electronics problem. By simply allowing the motor to spin back and forth, it would still create DC power with a consistent polarity on the inside of the 3-phase rectifiers. The problem, of course, was the huge fluctuations in voltage that would surely damage any traditional power filtering hardware.
The solution to this was a super capacitor bank, which acted as a highly tolerant battery, creating a consistent voltage output that could then be filtered with a standard buck/boost converter to power the other onboard electronics.
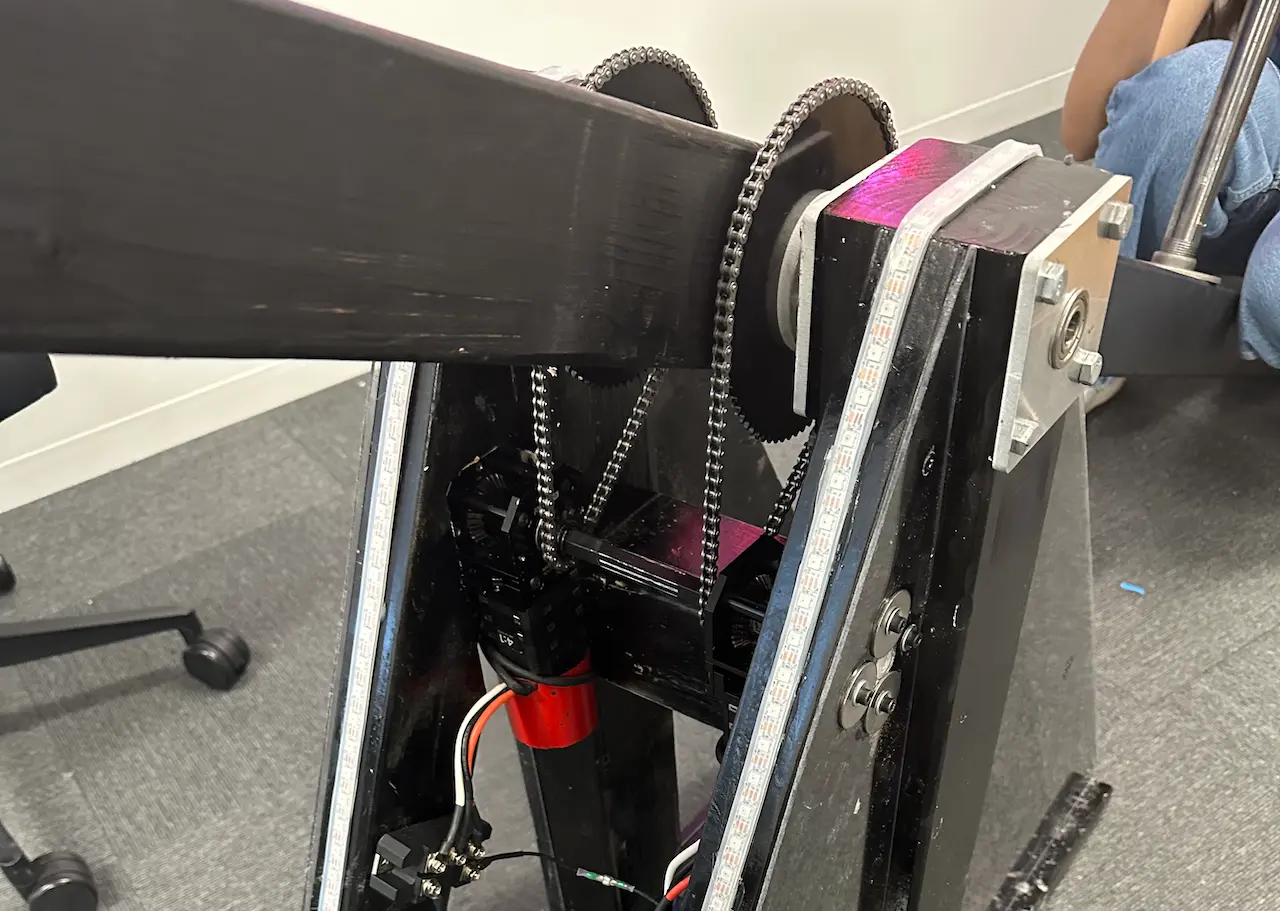
The result is a very simple setup with two chains, two motors, and some planetary gearboxes. As the motor spins back and forth, charging the super capacitor bank, you can even see the voltage increasing on a side-mounted analog volt meter — an added bonus.
Building The Frame
The frame sure looked simple in CAD, but building it in real life from very imperfect Home Depot lumber was not as straightforward. Did you know that 2 by 4 lumber is, in fact, 1.5 by 3.5? Ask me how I know.
Construction started by cutting all of the pieces from the wood beams, which we did on a miter saw set up in a parking lot. Then, the bottom half of the frame was glued up, clamped, and screwed with 3 and 4 inch long deck screws. The aluminum plates, which hold the bearings for the pivot shaft, were then dry fitted to do an integrated test. The result was a ridable see-saw — and we didn't hesitate to have some fun with it.
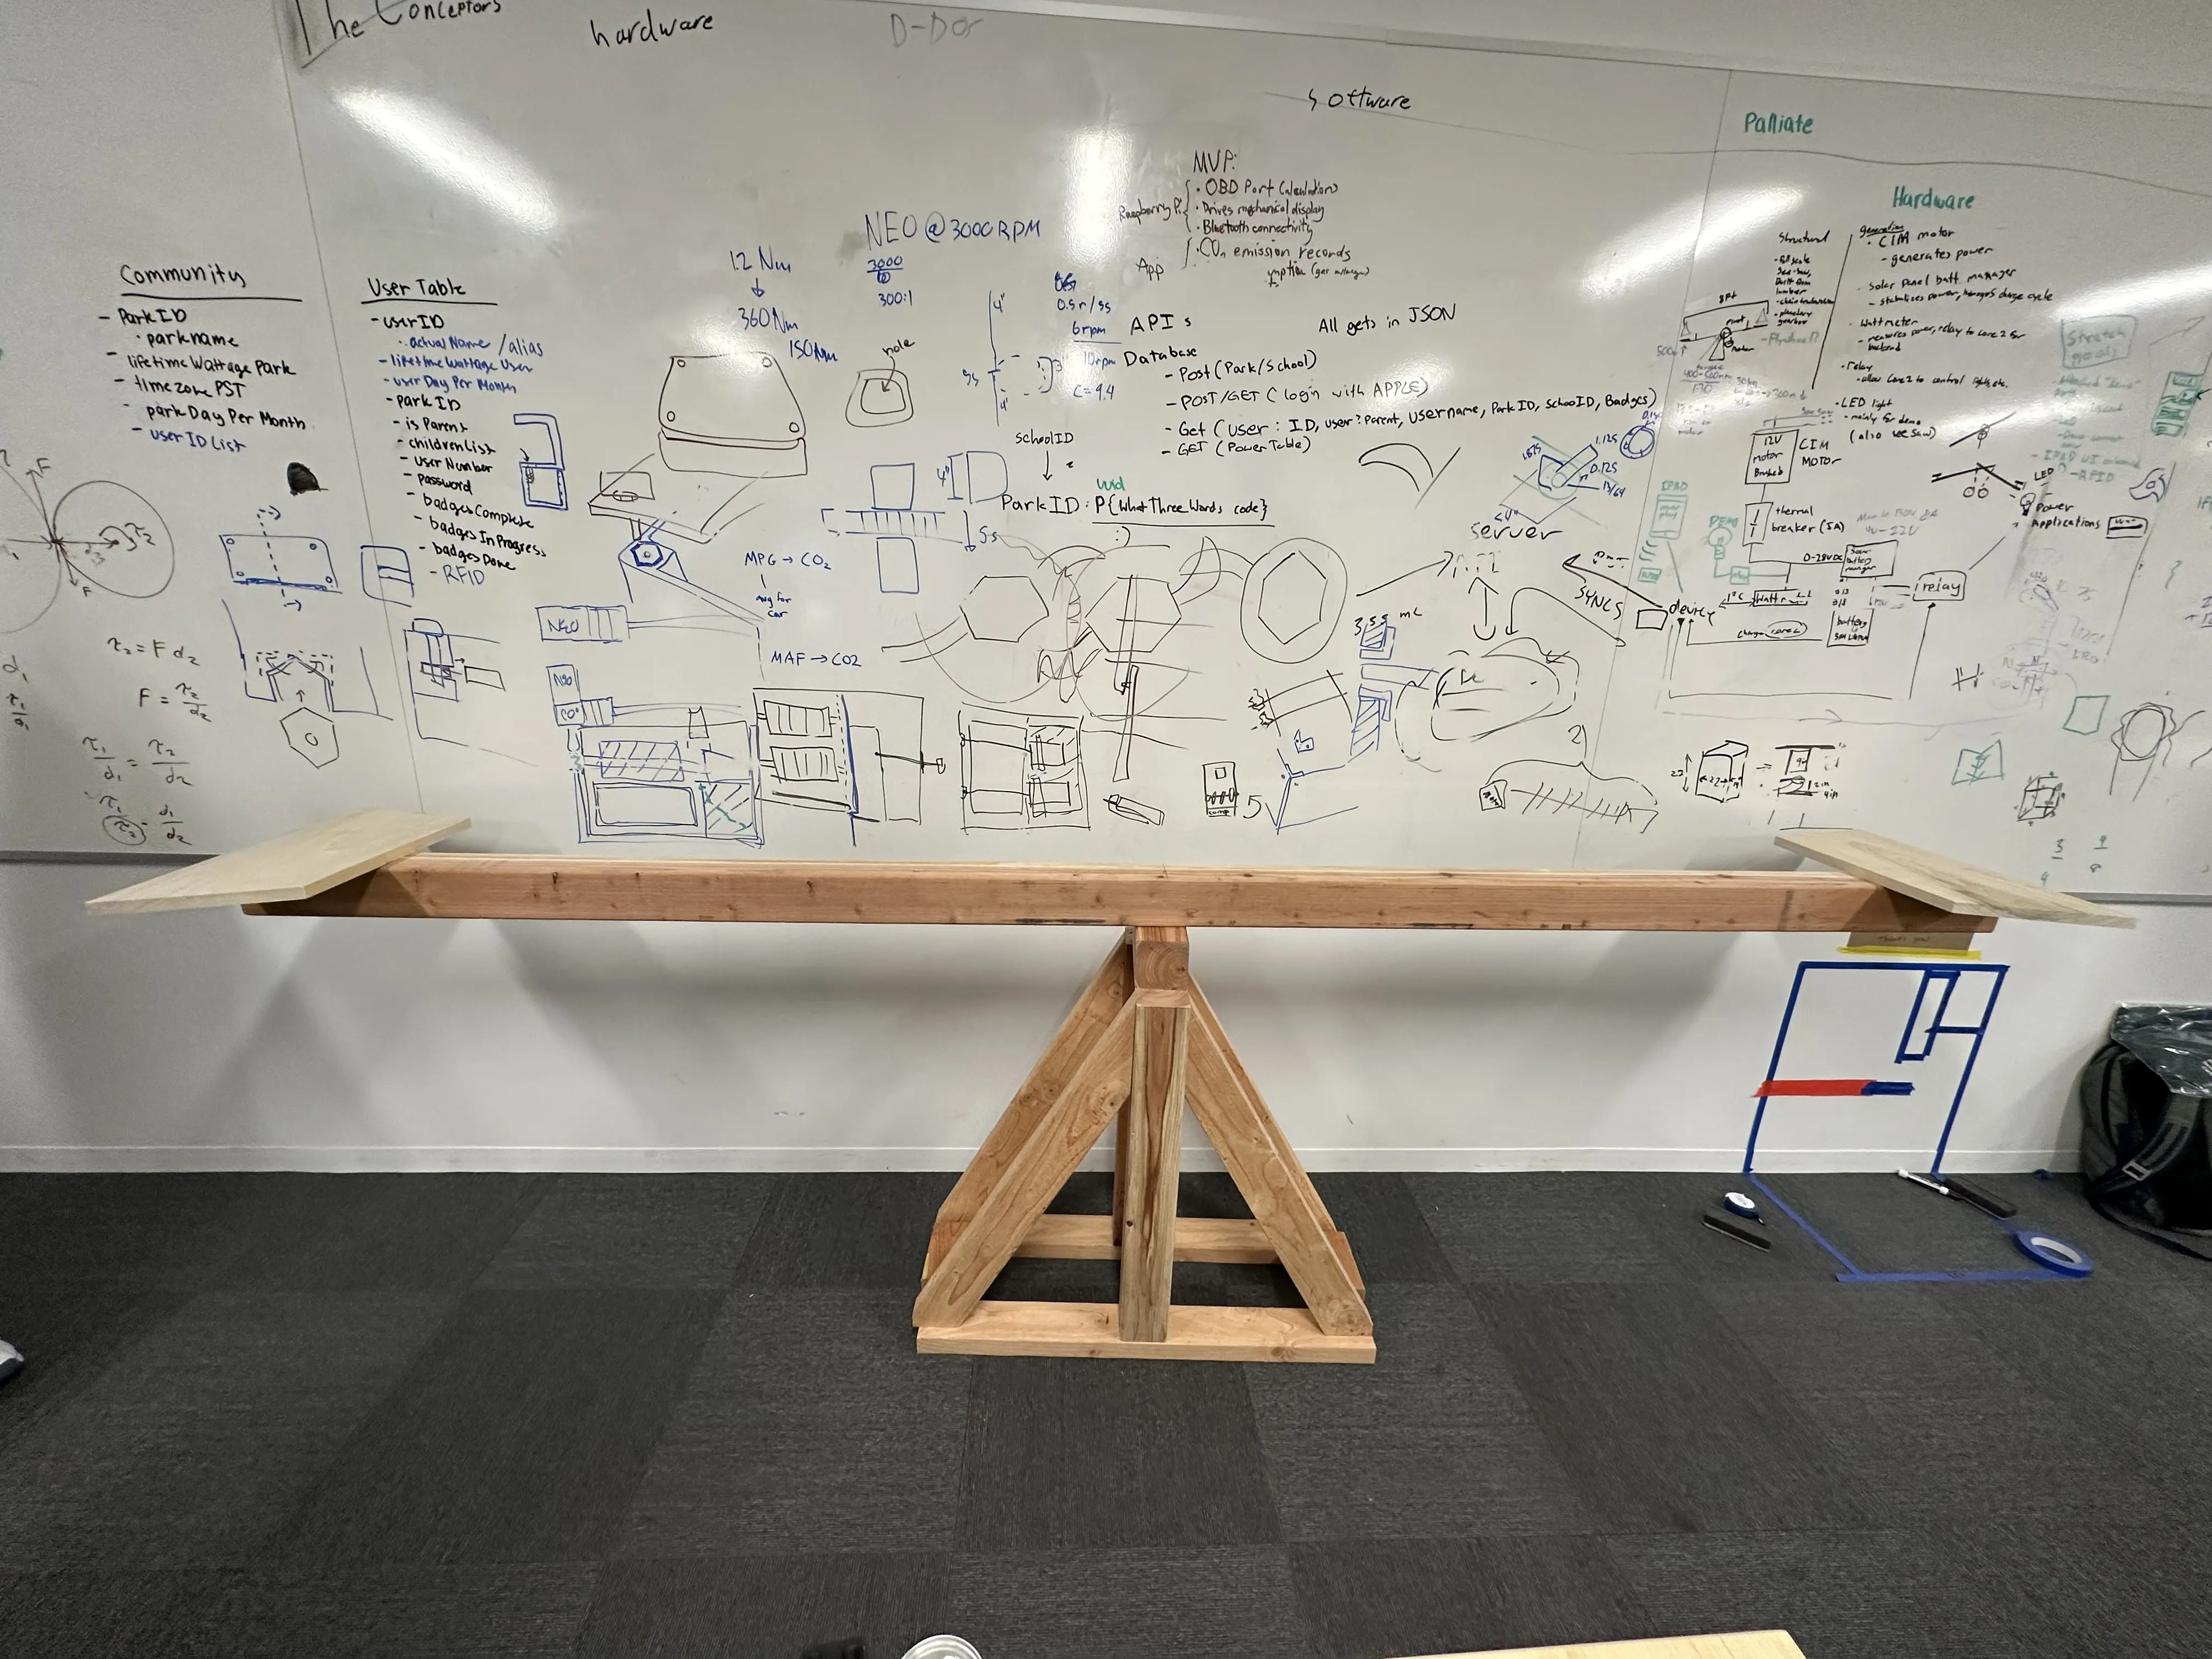
The next step was to take off all the electronics so we could paint the frame. Next, we installed all of the electronics and LEDs. There were some long nights, but we ended up with a really good looking base. The top crossbar was disassembled so it could be stained black and then reassembled with the seats, which were finished with polyurethane. Handles were added as a somewhat last-minute addition using parts from, you guessed it, Home Depot.
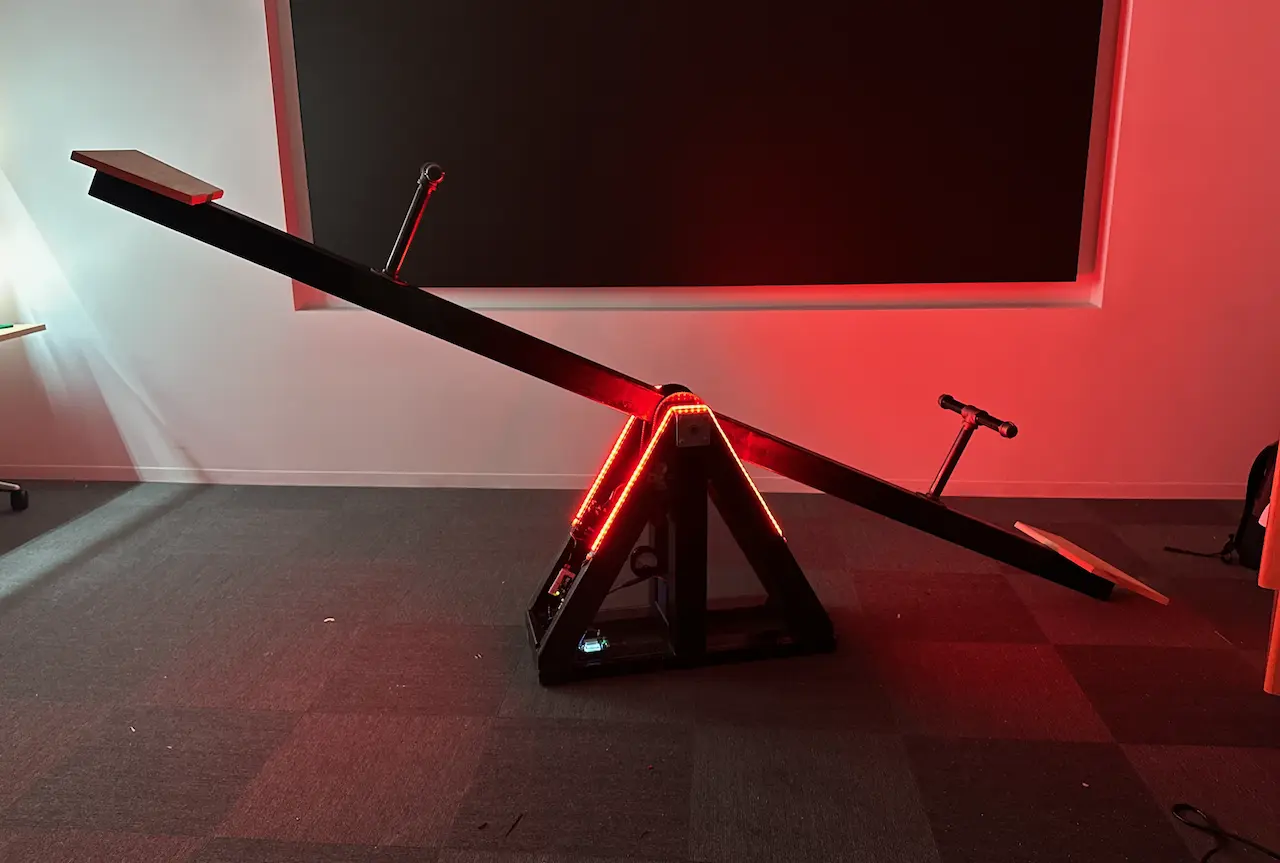
The actual construction of PowerPlay only took around three days and went pretty smoothly, all things considered. The result was a futuristic take on a classic see-saw design that we were all proud of.
Electronics
While I didn't write the firmware for PowerPlay, I was responsible for much of the electronics architecture. It was important that PowerPlay could connect to our cloud backend via WiFi, light up LEDs, and of course, log how much power had been generated. We wanted the unit to be self-contained, which meant everything had to run off of the generated power.
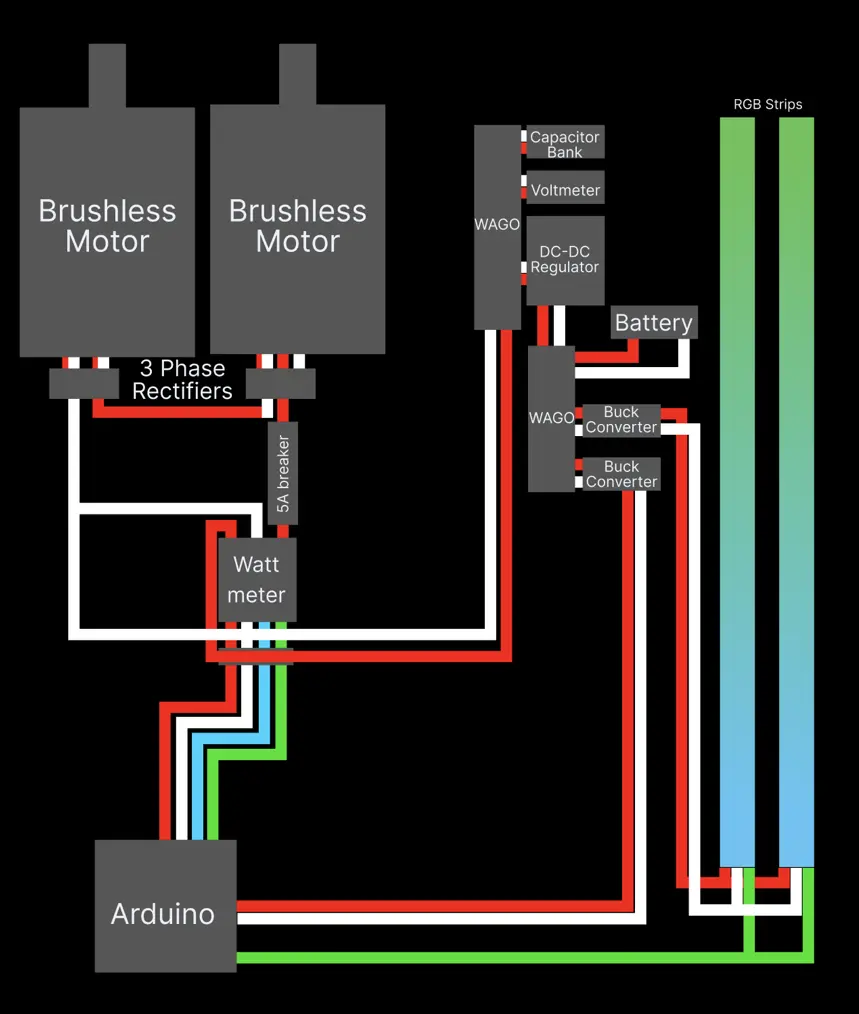
PowerPlay's final electrical layout looked like this. An Arduino MKR WiFi 1010 is powered off a 5v buck converter. It communicates with a wattmeter via I2C, which tells the firmware how much power is being generated. That buck converter also powers the LED strips.
The super capacitor bank is placed between the two 3-phase rectifiers and the buck/boost, which keeps the bus voltage stable.
A 5A breaker was added to avoid any damage to the system.
Was it a crazy idea? Yeah. Was it an awesome project? Also yeah! The combination of carpentry, mechanical engineering, app development and electronics made it really unique.
A huge thanks goes to Eddie, Nishka, Valerie and Aadit, my team members who helped bring PowerPlay to life. I learned so much while building PowerPlay, and it's a summer I will never forget.